How to View Asset Location History (Desktop)
The Location History tab on Asset Details displays the movement of assets based on their GPS pings or manual location updates.
Location History shows where an asset (with an appropriate installed and verified Tenna tracker) is or has been located. This article shows how to view Location History updates for an asset. The Location History tab in Asset Details is shown for assets that have:
- Category Type: Materials, Attachments, Tools, Equipment
- Tracker Type: TennaINTEL S1, TennaMINI Solar, TennaMINI Battery, TennaBLE (all), TennaQR (all)
NOTE: Assets with an active OEM Integration will not show Location History.
Permission Requirements:
- Users with the View Location History permission enabled can view an asset’s Location History
In this article:
How to Access Location History Tab
- 1
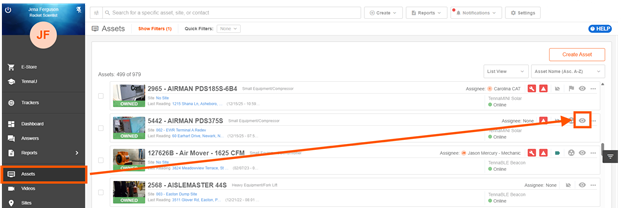
- From the Assets feature, click on an asset to open the Asset Details page.
- 2
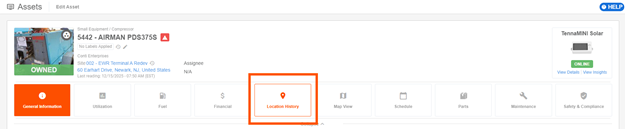
- Click on the Location History tab.
- 3
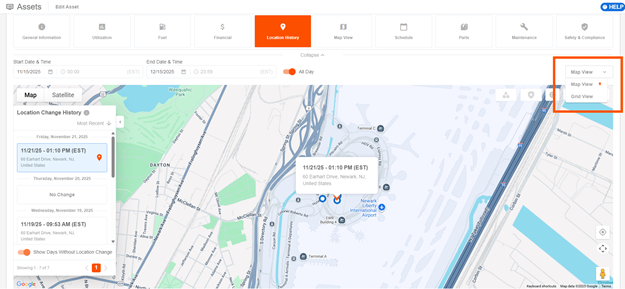
- To switch between Map View and Grid View, click the drop-down menu at the top right.
Location History in Map View
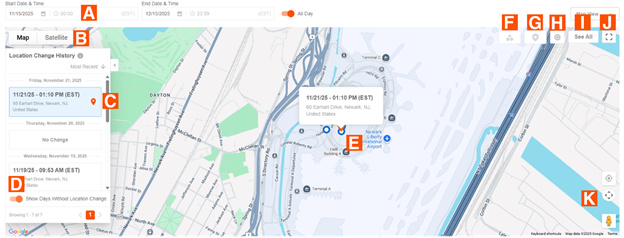
The image and legend below shows how to navigate Location History in Map View:
A. Select Start and End Dates to show on the map. Click the “All Day” toggle to turn start and end times on or off.
B. Toggle between Map (shown below) or Satellite map terrain
C. Click on a Location in the history menu to view it on the map.
D. Click the toggle to show or hide dates of pings without a location change.
E. Click on a point on the map to open details about the ping.
F. Select to Show or Hide Geofences
G. Select to Show or Hide Security Perimeters
H. Click to View Tracker Insights
I. Click See All to zoom out to see all location history pings in the date range on the map.
J. Click the icon in the top right to open the map in full screen view
K. Utilize the map controls at the bottom of the map: jump to your location, manual map controls, and Google Street View.
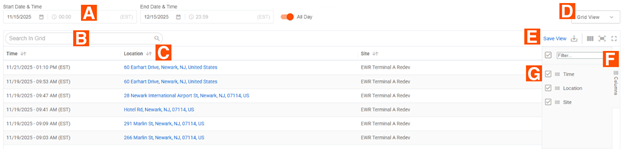
Location History in Grid View
The Grid View is helpful for a zoomed-out view of multiple location history pings in a specified date range. It is also helpful for quickly finding details by using the search bar, columns, and filters.
Utilize the controls in Grid View:
A. Select Start/End Dates and Times. Click the All Day toggle if you do not want to narrow down to specific times.
B. Use the search bar to search within the grid.
C. Click the arrows on the column names to sort the grid alphabetically.
D. Click the drop-down menu to switch between Grid View and Map View.
E. Use this menu to Save View (your currently filtered view), Export the grid, or format the columns.
F. Click Columns to open the Columns menu shown.
G. Click the checkboxes next to the columns to show or hide in the grid.
The Location History Grid View includes the following data:
- Time: Date and time of the location update ping.
- Location: Address of the asset at the time of the location update.
Pro Tip! Click on the location address to open a map view of the ping.
- Site: Site Name (if applicable) of the location update ping.