How to Create and Submit a Request (Desktop)
Users can submit requests for a specific asset or labor resource needed for a job, or a general request for any resource within a particular category.
Submitting a request notifies other jobsites of your resource needs, allowing site managers to approve or deny requests based on their availability. Equipment managers then have final approval to coordinate and mobilize resources across sites — ensuring every project has the right people and equipment, exactly when they're needed.
💥Requests is a premium product and requires a separate license. Please contact your Account Manager for more information on premium product licenses or reach out to Customer Support at help@tenna.com or call 888.836.6269.
NOTE: A request kicks off a process that connects all parties with visibility and communication across the field, shop, and office.
Permission Requirements: ANY user can request to book (or reserve) any asset/labor resource in the asset library for any time, regardless of the current location, status, or existing reservations.
Secondary Permissions:
- Asset Request Approval allows the permissioned user to approve or deny all requests for assets.
- Crew and Labor Resource Request Approval allows the permissioned user to approve or deny all requests for labor resources or crews.

Create a Request
- 1
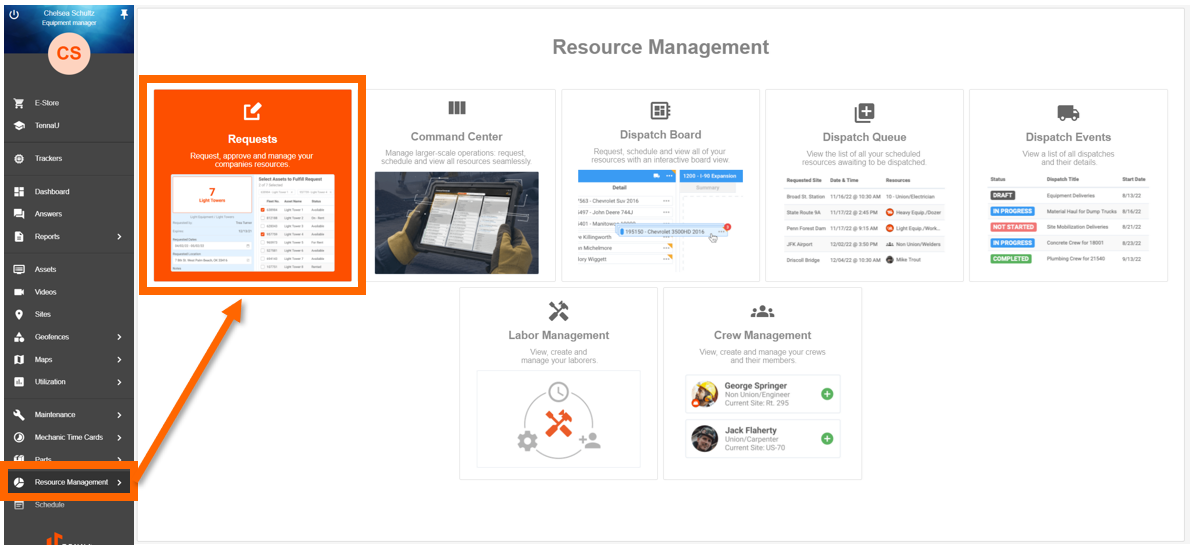
- Click Resource Management on the navigation menu on the left side of the screen, then click the "Requests" tile.
- 2
- Click "Create Request" on the top right of the screen.

Note: This screen may look slightly different depending on your permissions.
- 3
- Complete the request details using the dropdown menus.
- Site Requested For: The site that needs the resource.
- Requested Location: Auto-populates based on the site selected, but can be manually updated.
- Recipients to Notify: (optional) Select individuals to notify of the pending request.
- 4
- Select "Add Asset Request" or "Add Labor Resource Request" depending on which type of request you want to make.

- 5
- Use the panel on the left to find the resource you would like to request.

You can make specific requests or category requests— in which case the Approver will assign the best available option.
- 6a
- For an asset request, select "Categories" or "Assets" on the top left side and select resource you would like to request.
- Categories: Use the search bar at the top or scroll through the list of categories to select the type of asset your want to request.
- Assets: Use the search bar or scroll through the list to find the specific asset you want to request.

- 6b
- For labor resource request, select "Labor Category", "Laborers", or "Crew" on the top left side and select resource you would like to request.
- Labor Category: Use the search bar at the top or scroll through the list of categories to select the type of laborer your want to request.
- Laborers: Use the search bar or scroll through the list to find the specific laborer you want to request.
- Crews: Use the search bar or scroll through the list to find the specific crew you want to request.

- 7
- Once you have selected the asset or labor resource, fill in the specific request information on the right side of the screen.
- Request Quantity: How many assets/labor resources needed.
- Requested Dates: The dates that the asset/labor resources are needed for.
- Start/End Time: The start time for the first day of the request and the end time for the last day of the request.
- Requested Location: This will auto-populate for you unless overwritten.
- Notes: Any notes that will help with understanding the specifics of your request.
- 8
- Select "Add to Request".
- 9
- Repeat these steps to add additional asset or labor resource requests for your site as needed.
- 10
- Select "Submit Request" on the bottom right of the Request Summary.

The field management team, as well as the asset's current assignee (if applicable), at the site that your requested resource is currently located on will receive a notification of your request for their resource.
You will be notified of the request's progress including when it is approved, denied, or expires.
Clone a Request
- 1
- Click Resource Management on the left navigation menu on the left side of the screen, then click the "Requests" tile.

- 2a
- Click the dotted icon for the request you'd like to clone.

Review the request details and select "Clone Request".

- 2b
- Multi-select the requests you'd like to clone by clicking the boxes on the left of the requests.

Select the "Clone" action.

Review the request details and click "Clone Requests".
- 4
- The cloned request(s) are then sent to the approver.