How to Configure Permissions & Notifications (Desktop)
Permissions must be set up to allow users to utilize the platform properly. To do this, Permission Codes and Permissions Groups must be configured.
Refer to Permissions & Notifications Overview for more details.
Permission Requirements: Power Users and users with the “Manage Permissions” permission have the ability to create and edit permissions.
NOTE: Permissions can only be configured on a desktop, not in the Tenna App.
To configure permissions, click the “Settings” button on the top right and then select the “Permissions” tab.
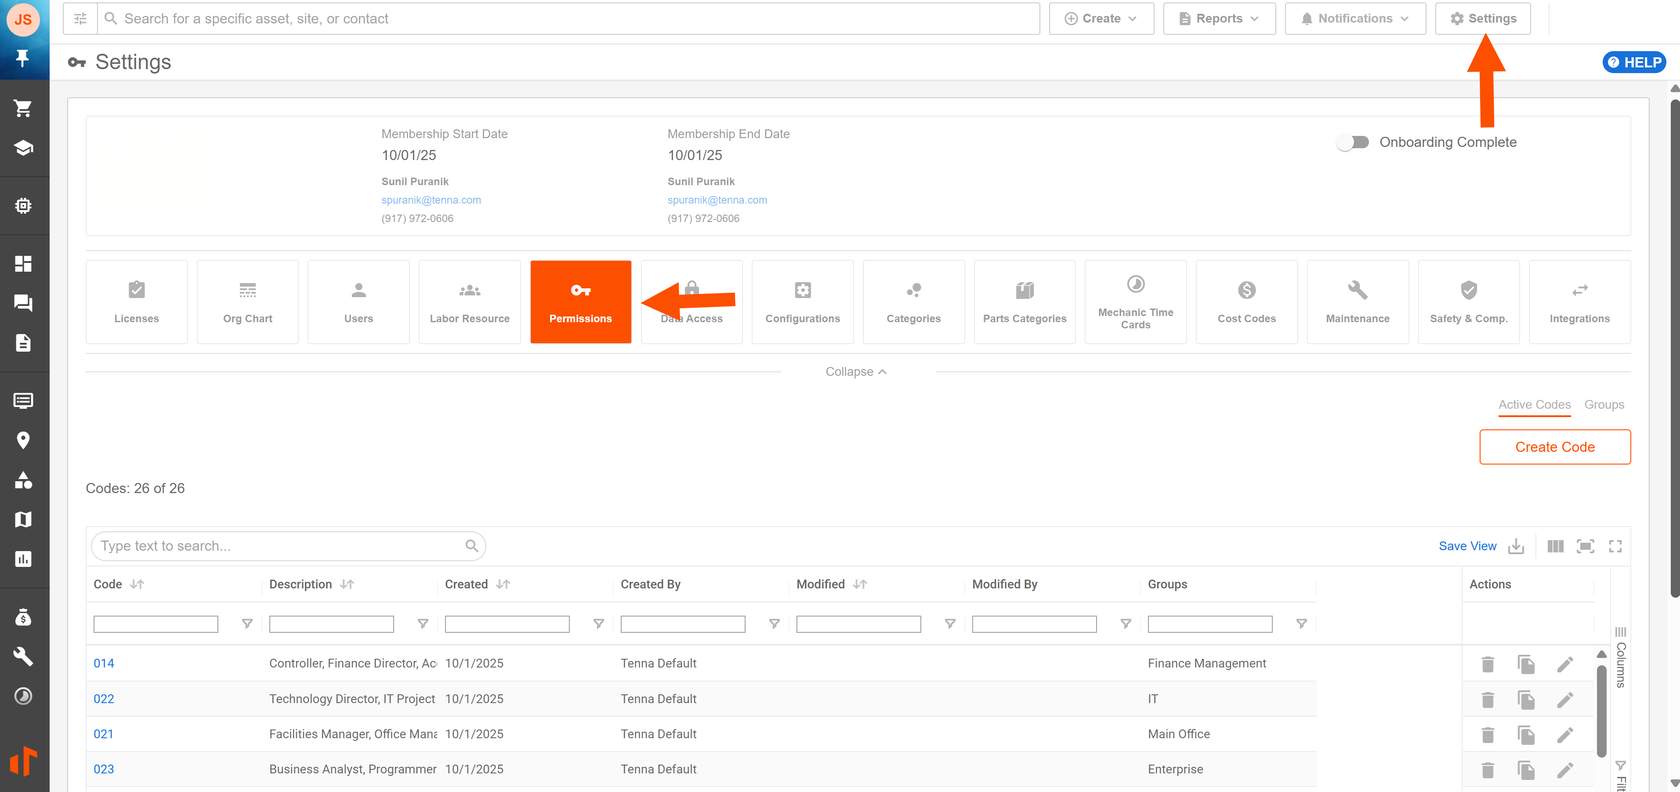
How to Configure Permission Codes
For convenience, Tenna provides a list of default Permission Codes with permissions already configured. You have the option to edit an existing code or create a new code.
- 1
- Select the Permission Code you would like to edit or click "Create Code" on the top right to create a new Permission Code.
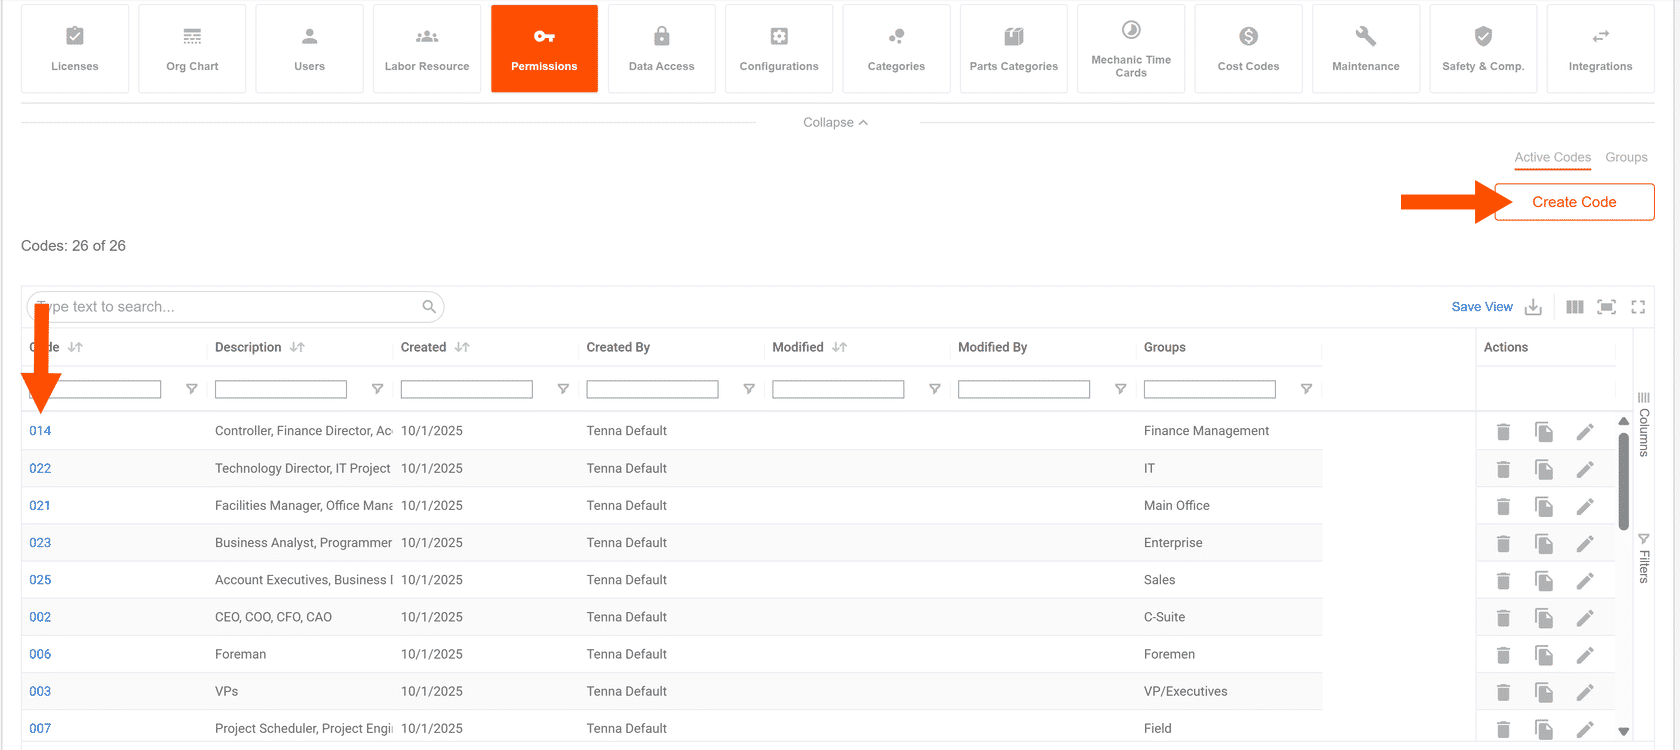
NOTE: You can also duplicate an existing Permission Code by clicking the “Duplicate” icon to the right of the code.

- 1a
- If you are creating a new Permission Code, enter the Code Name on the top left.

- 2
- Edit the Permission Code as needed.
- 2a
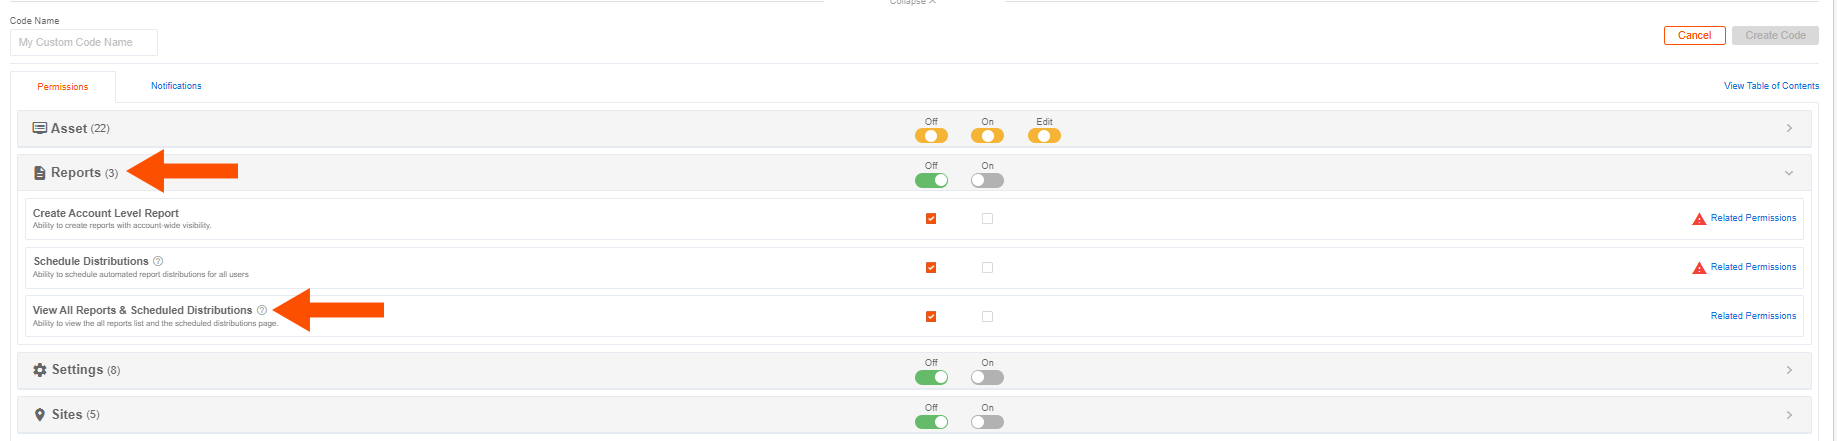
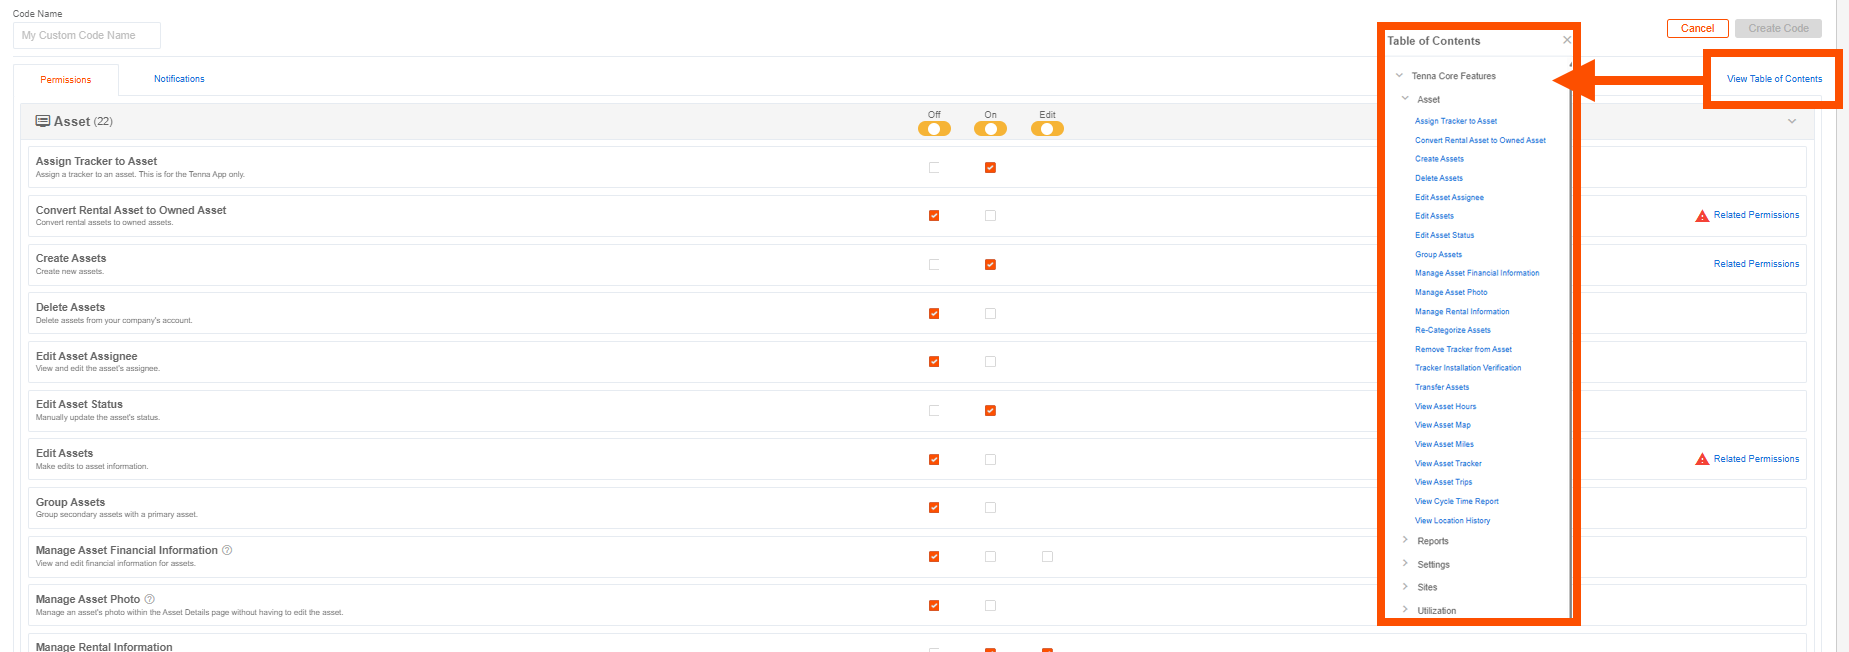
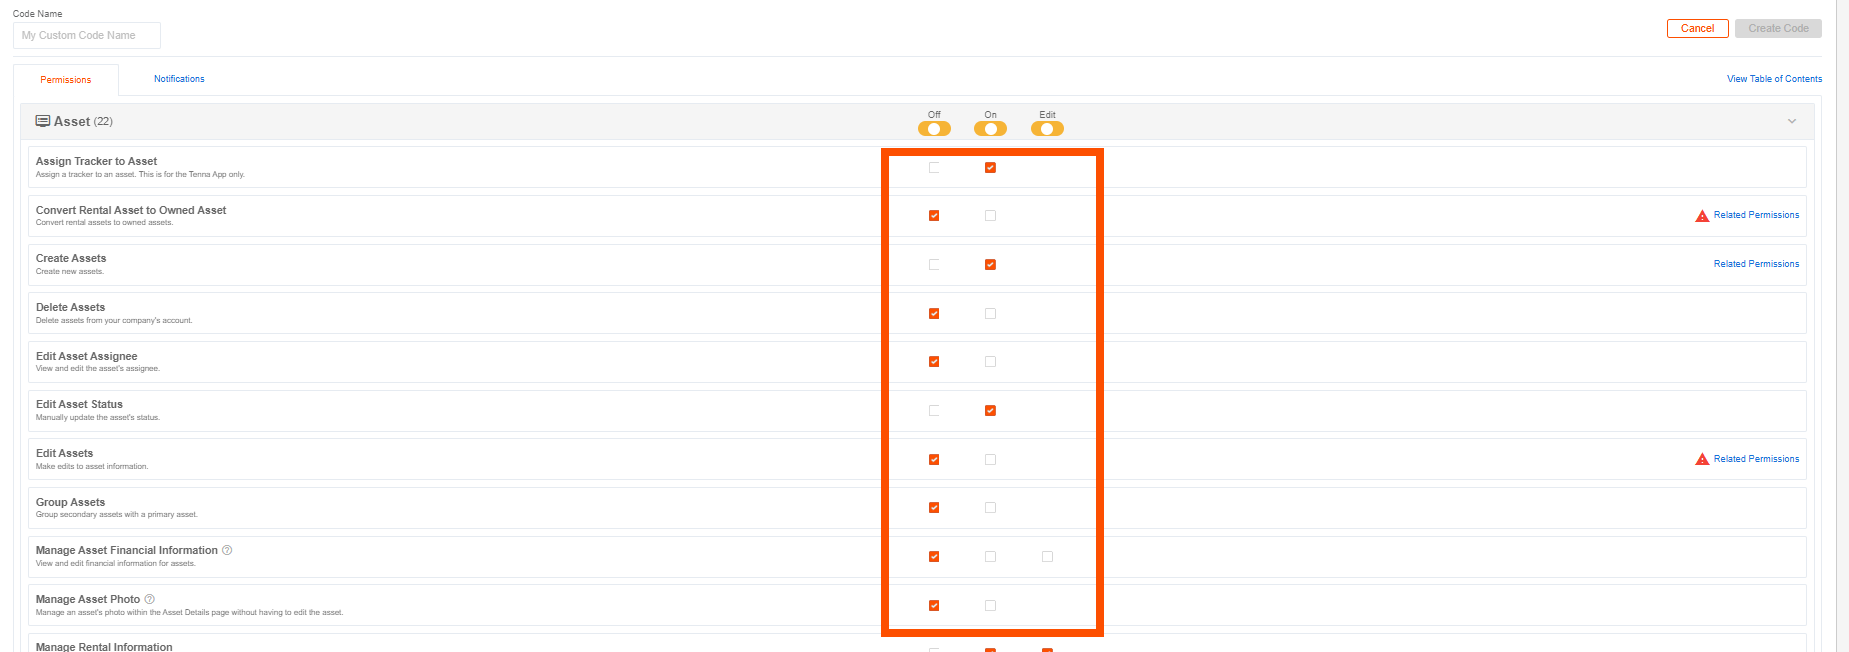
- Click on a feature to view its permissions.
A brief description of the permission is shown under the permission title. Hover over the “information” icon to view additional information on the permission.
PRO TIP! To quickly jump to a specific permission, click “View Table of Contents” on the top right. Click the dropdown next to the feature to expand the view and then click on the specific permission.
- 2b
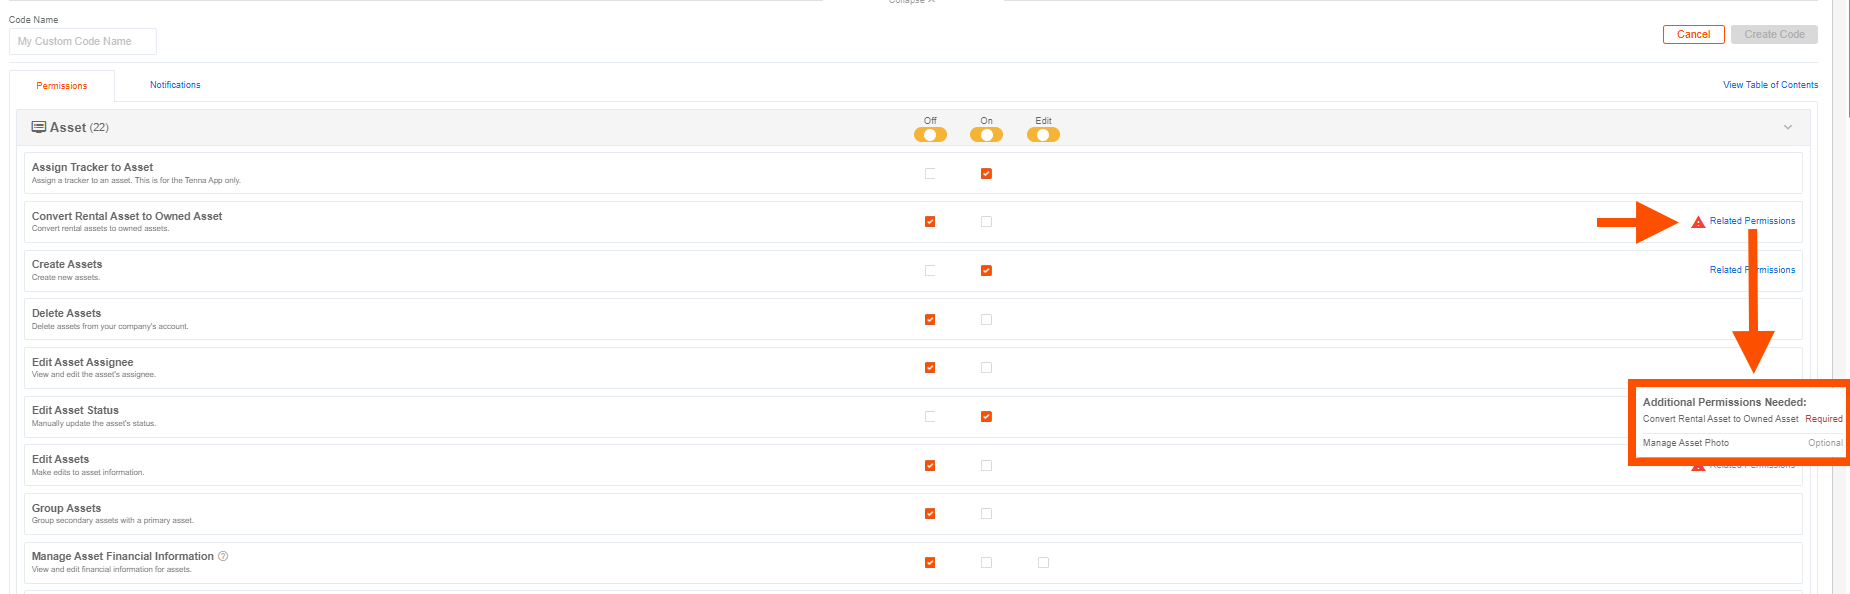
- Use the checkboxes to turn permissions "On", "Off", or "Edit" for this Permission Code.
NOTE: If “Related Permissions” is shown to the right of a permission, there are additional required or optional permissions that are associated with that permission. The “alert” icon indicates there is a related permission that is required for the permission to function properly. Hover over “Related Permissions” to view the optional and required permissions.
- 3
- Edit the notifications as needed
- 3a
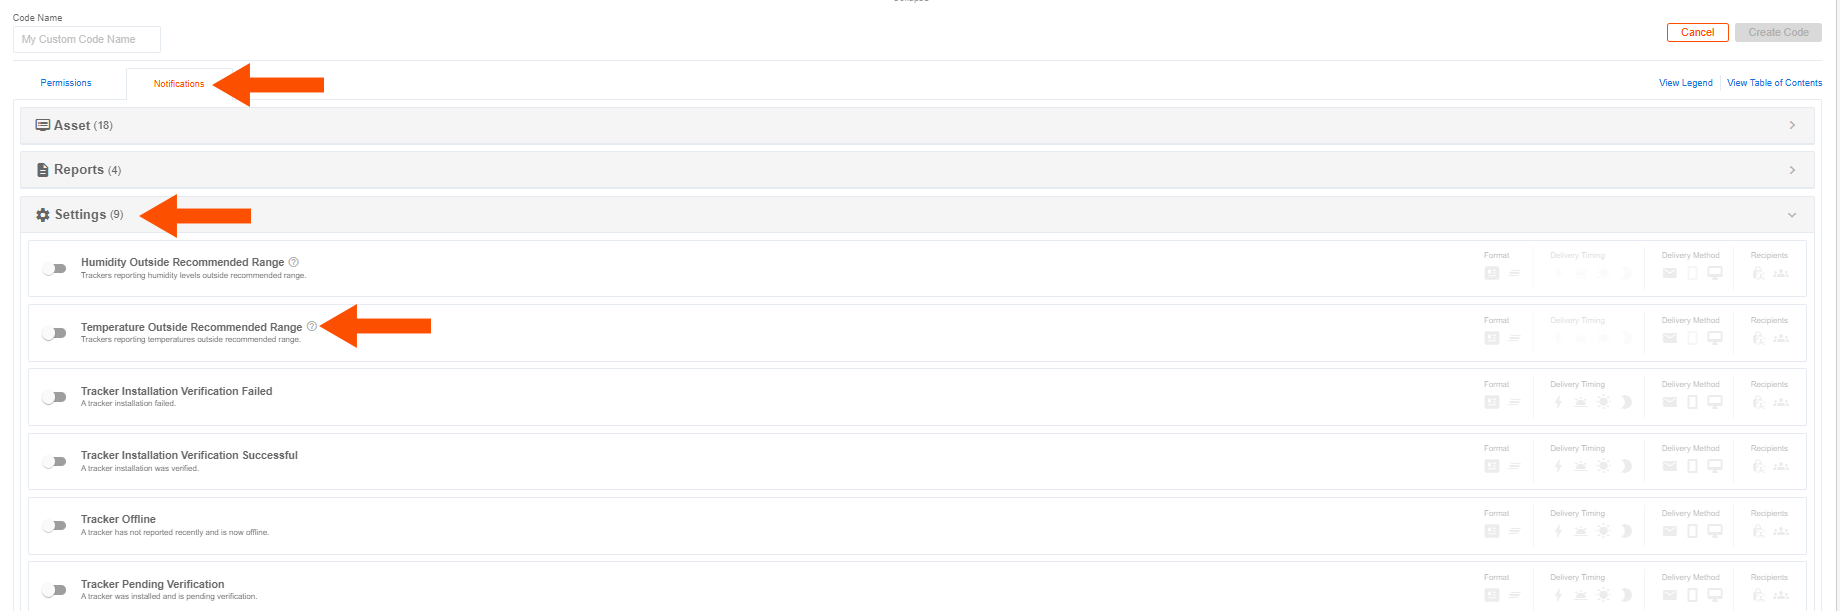
- Click "Notifications" on the top left.
- 3b
- Click on a feature to view its related notifications.
A brief description of the notification is shown under the notification title. Hover over the “information” icon to view additional information on the notification.
PRO TIP! Like the Permissions screen, to quickly jump to a specific notification, click “View Table of Contents” on the top right and select the notification you would like to jump to.
- 3c
- Use the toggles to turn notifications on or off for this Permission Code.
- 3d
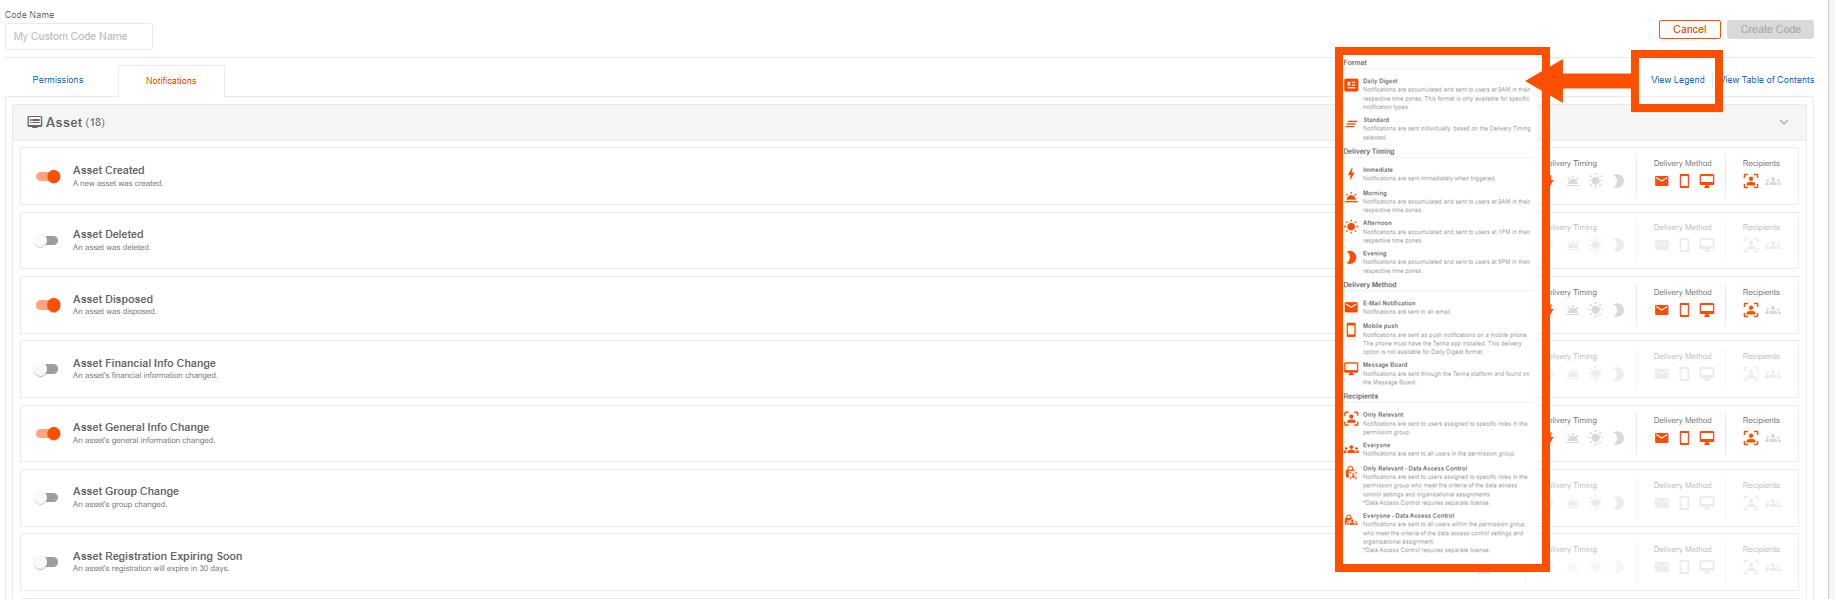
- Use the icons on the right to edit the delivery timing, delivery method, or recipients for this Permission Code.
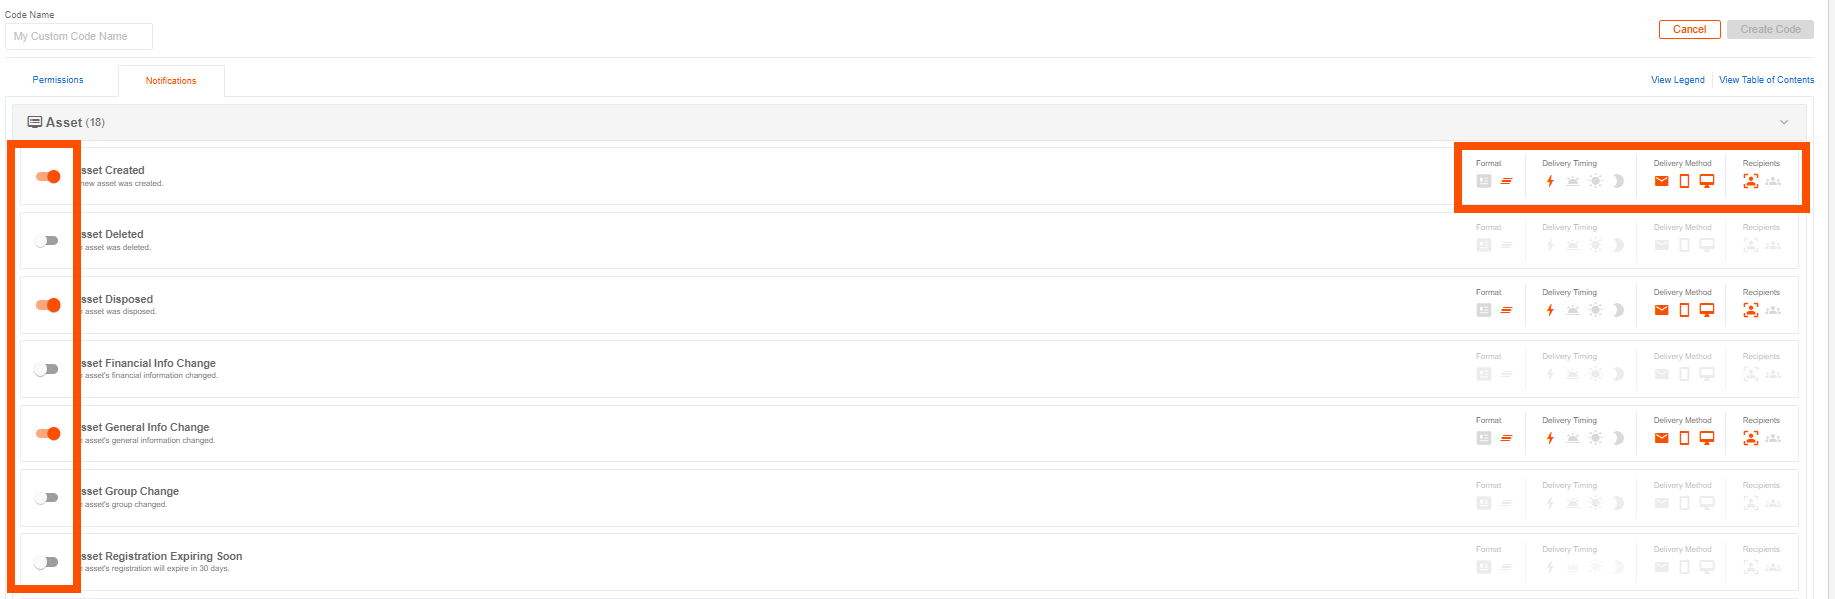
NOTE: Click “View Legend” on the top right to see the definitions of each icon.
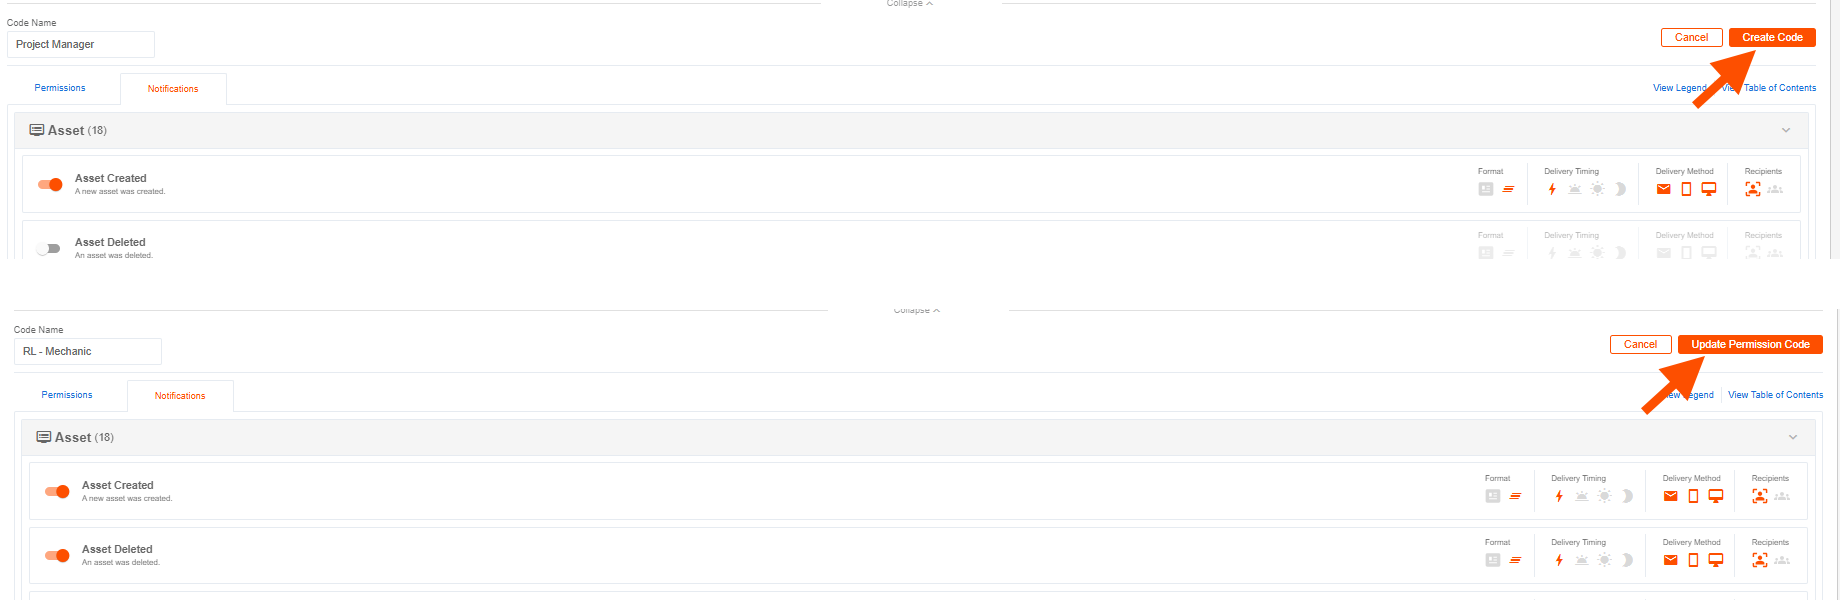
- 4
- Click "Update Permission Code" or "Create Code" on the top right.
Now that the Permission Code has been created/updated, it must be associated with a Permission Group.
IMPORTANT! A Permission Code can only be applied to a user if it is associated with a Permission Group. If a Permission Code is not assigned to a Permission Group, it will not work.
How to Configure Permission Groups
For convenience, Tenna provides a list of default Permission Groups. These groups already have a Permission Code added and just need users assigned to them. You have the option to edit an existing group or create a new one. The steps for adding users to a Permission Group are the same
NOTE: We recommend assigning one Permission Group per user. However, we understand that some users have multiple functions (for example, a user may need to access safety information as well as shop information. If adding a user to more than one Permission Group, please note that if a permission is turned on in one group and off in another, the permission will be on for the user.
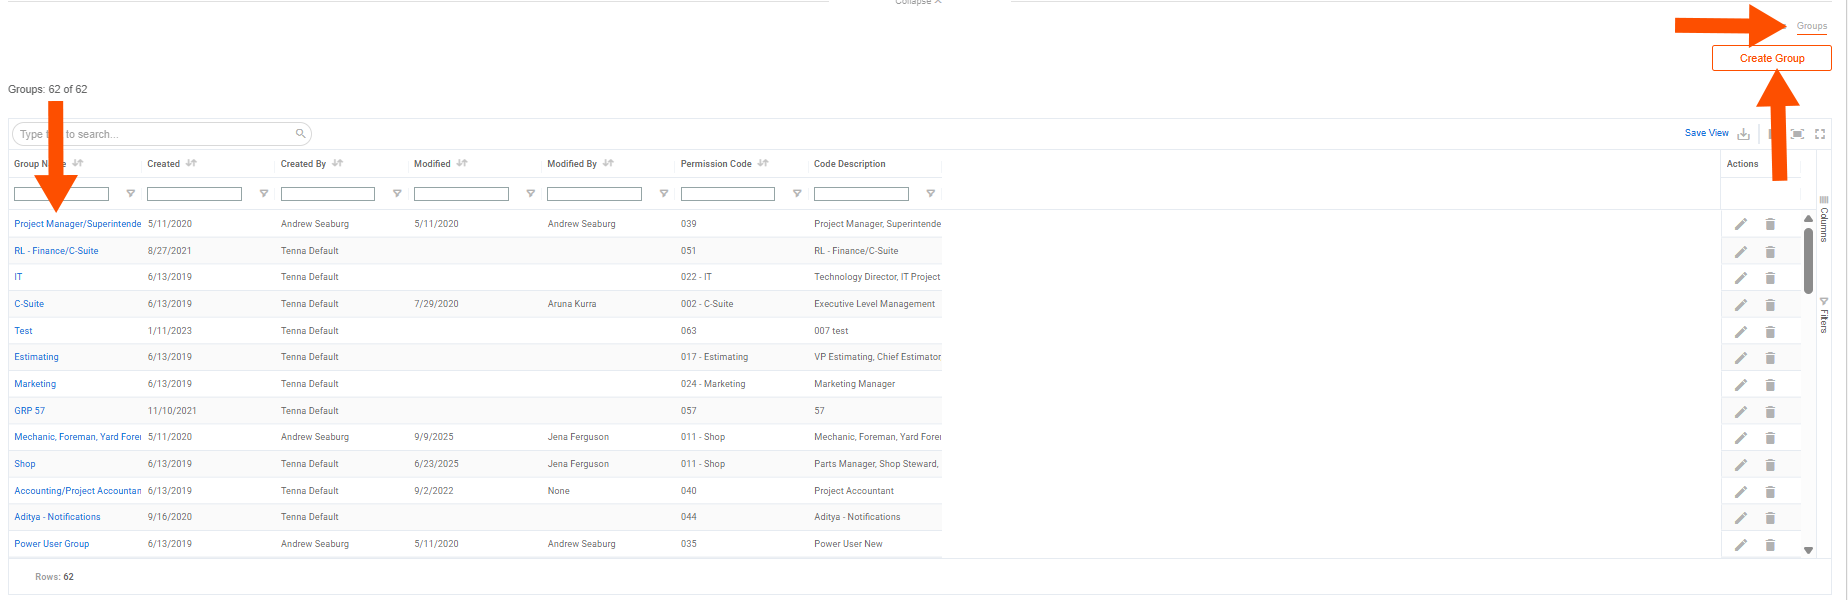
- 1
- Click "Groups" on the top right.
- 2
- Select the Permission Group you would like to edit or click "Create Group" on the top right to create a new Permission Group.
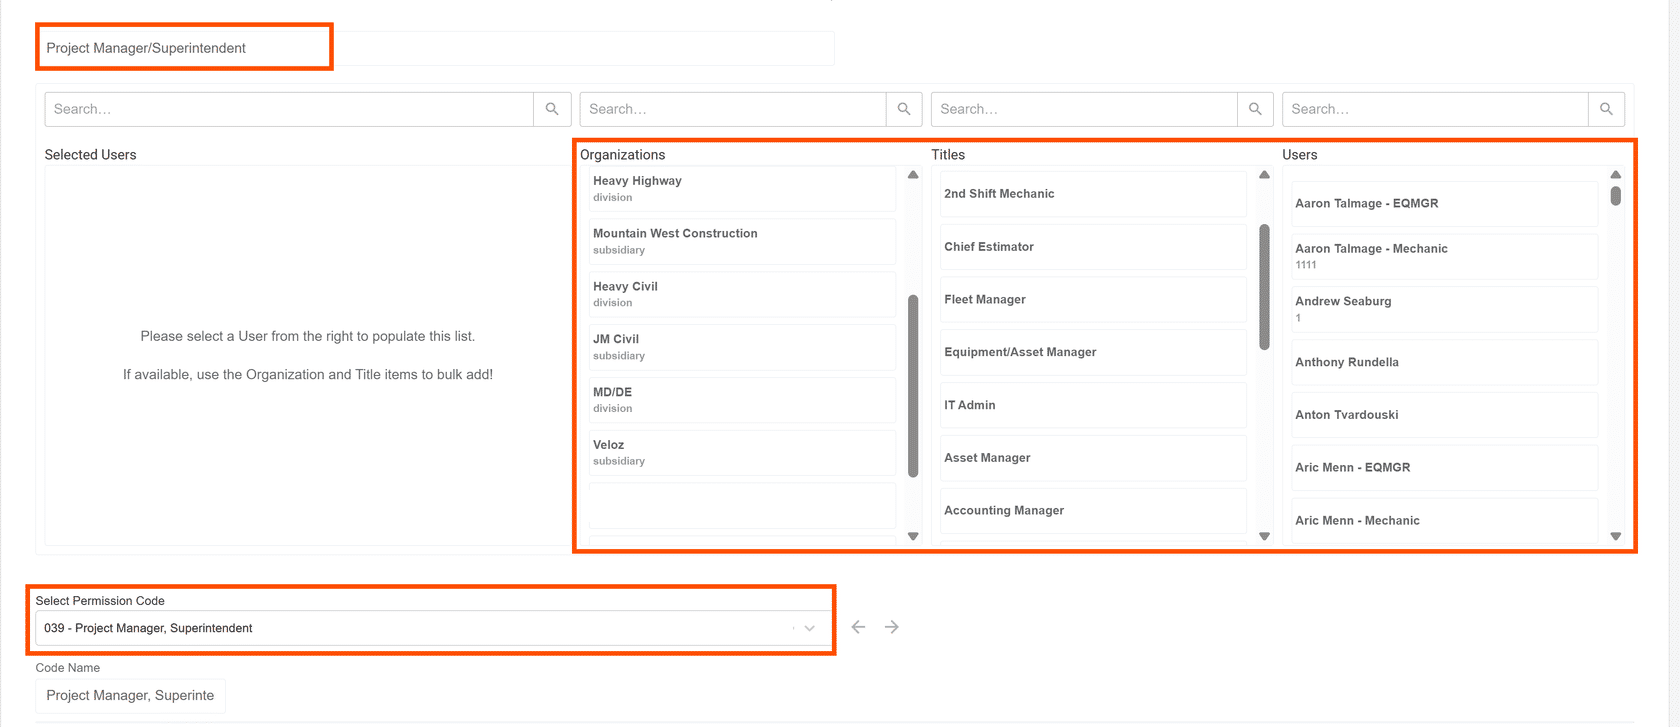
- 3
- Enter a name, or edit the existing name, for the permission group on the top left.
- 4
- Select the organization(s), title(s), and/or user(s) to add to the Permission Group.
- 5
- Use the dropdown on the bottom left to select, or change, the Permission Code that will be associated with the group.
- 6
- Scroll to the bottom and click "Update Permission Group" or "Create Permission Group".
How to Delete a Permission Code
If a Permission Code is deleted, any Permission Group(s) the code is associated with will also be deleted. Any users that are part of that Permission Group will no longer have this Permission Code.
If this was the only Permission Group a user was a part of, the system reverts that user to the Basic Access permissions.
If this Permission Code was not part of a Permission Group, deleting it simply removes it from the list of Permission Codes.
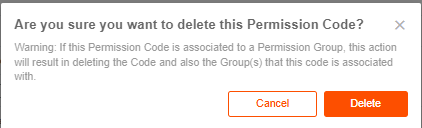
- 1
- Click the "trashcan" icon to the right of the Permission Code you want to delete.

- 2
- Click "Delete" to confirm or "Cancel" to go back.
- 3
- Review any effected users whose permissions may be impacted by this change.
How to Delete a Permission Group
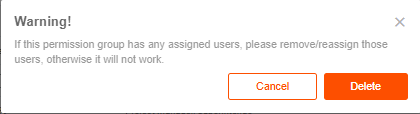
If a Permission Group is deleted, any users that are part of that Permission Group will no longer have that group's Permission Code.
If this was the only Permission Group a user was a part of, the system reverts that user to the Basic Access permissions.
- 1
- Click the "trashcan" icon to the right of the Permission Group you want to delete.

- 2
- Click "Delete" to confirm or "Cancel" to go back.
- 3
- Review any effected users whose permissions may be impacted by this change.