How to Create, View, and Edit Rate Codes and Revenue Codes (Desktop)
Rate Codes and Revenue Codes help connect asset activity to financial reporting and ERP systems. This article explains what Rate and Revenue Codes are, as well as how to create and manage them in your account.
Permission Requirements: Users with the “Manage Job Settings” permission enabled can view, create, and edit Job Codes.
💥Jobs - Financials is a premium product and requires a separate license. Please contact your Account Manager for more information on premium product licenses or reach out to Customer Support at help@tenna.com or call 888.836.6269.
Overview
Rate codes answer “how much should we charge?” by defining pricing rules such as hourly, daily, overtime, mileage, or minimum rates.
Revenue codes answer “where should the income be recorded?” by mapping billed amounts to the correct revenue category or general ledger account.
Together, they support consistent billing, accurate reporting, and clean ERP integration without changing previously created entries.
How Rate Codes and Revenue Codes Differ from Phase and Cost Codes
Tenna also supports Phase and Cost Codes. Here's how the four code types differ and complement each other:
| Code Type | Question It Answers | Primary Purpose | Example |
|---|---|---|---|
| Rate Code | "How much should we charge?" | Defines pricing/billing rules — hourly, daily, weekly, overtime, mileage, minimum charges, etc. | EX-DLY-STD (Excavator Daily Standard Rate — $1,500/day) |
| Revenue Code | "Where should the income be recorded?" | Maps billed amounts to the correct GL account/revenue category for financial reporting | Equipment Rental Revenue, Labor Revenue, Hauling Revenue |
| Phase Code | "What part of the job does this belong to?" | Organizes work by project phase, activity, or work breakdown structure | Mobilization, Site Prep, Excavation, Structural Steel |
| Cost Code | "How should this expense be classified?" | Categorizes costs for parts, labor, maintenance, or sublet work — maps to ERP expense accounts | Brakes, Transmission, Tires (component-based), or expense account codes |
How Codes Work Together
A single transaction can use all four. For example, a crane on a bridge project might have:
- Rate Code → Daily rental rate ($1,500/day)
- Revenue Code → Equipment Rental Revenue (GL account 4010)
- Phase Code → "02-050 Excavation" (project phase)
- Cost Code → Internal expense classification for the cost entry
Rate Code, Revenue Code, and Phase Code are all carried forward onto cost/billing entries when they're generated, and changes only apply to future entries — existing entries retain the codes from when they were created.
Note: Codes themselves do not impact the financial output of entries — they're for reporting, categorization, and ERP integration purposes.
How to Create a Rate or Revenue Code
- 1
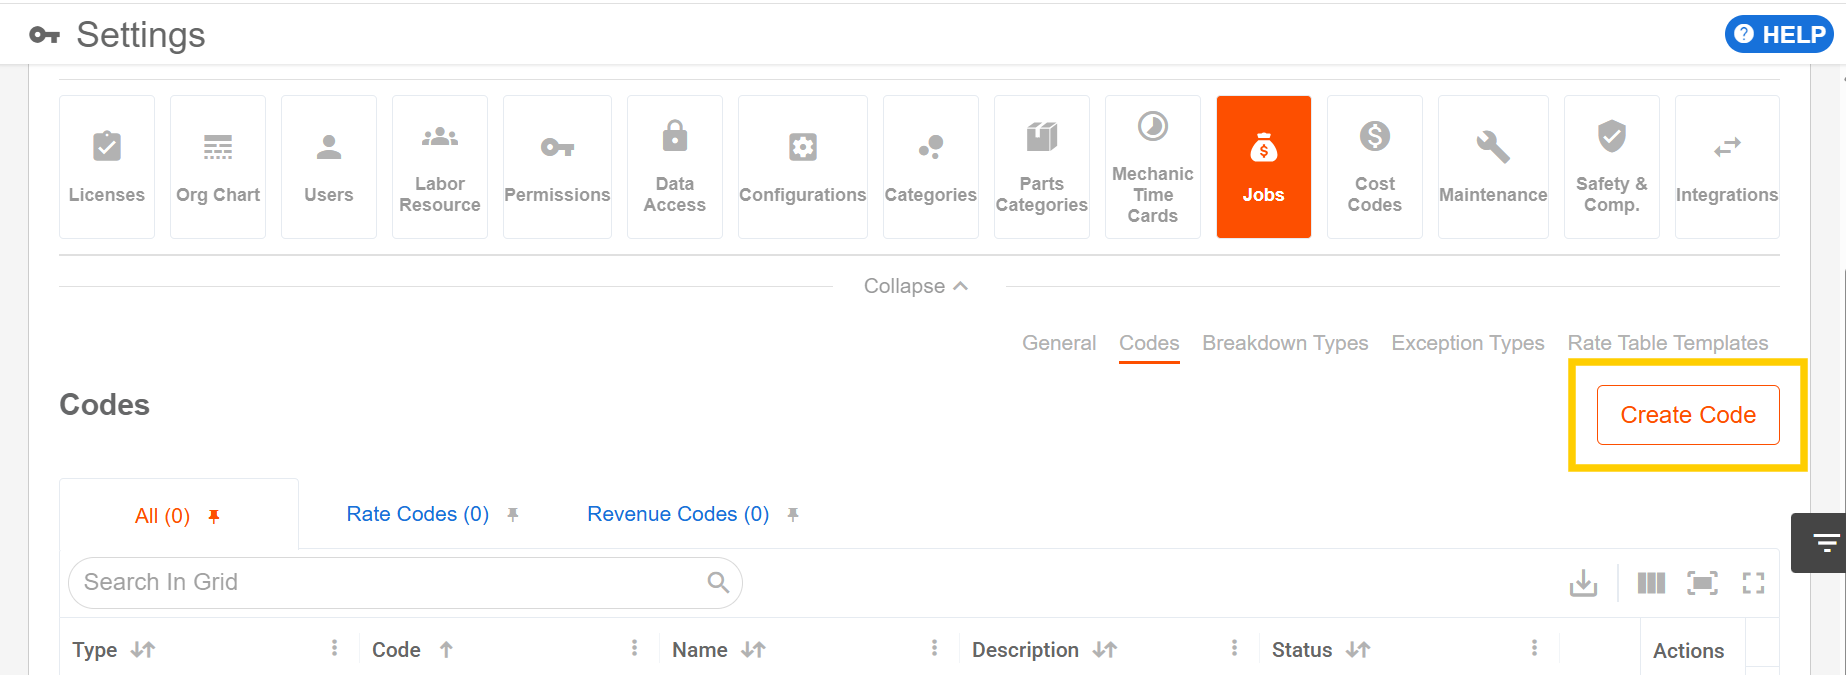
- Click "Settings", then "Jobs", then the "Codes" tab.

- 2
- Click "Create Code".
- 3
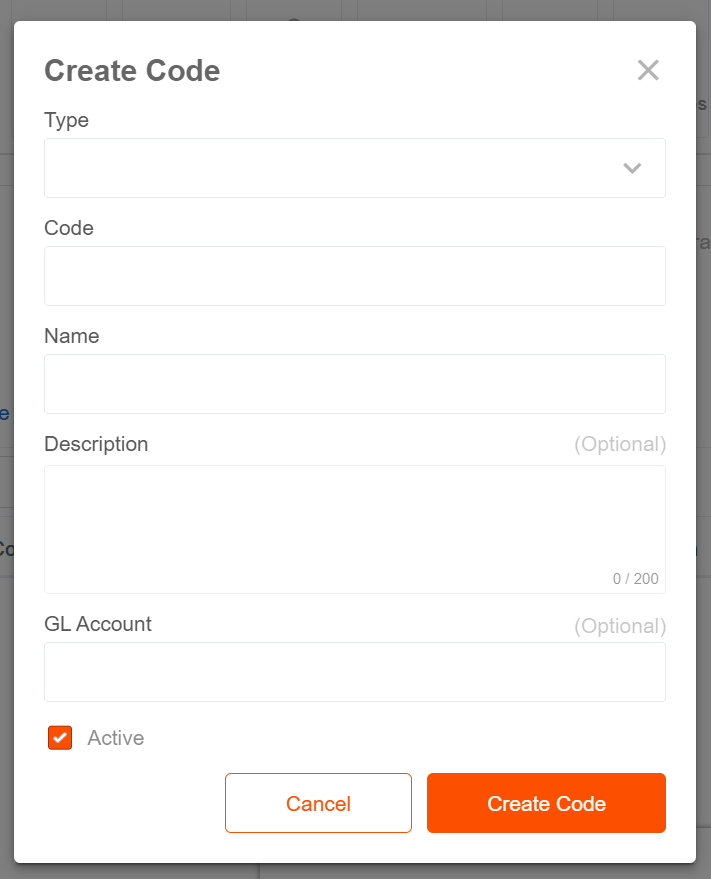
- Fill out the appropriate fields.
*Required Fields
*Type: Choose Rate or Revenue
A Code Type must be chosen for each Code and cannot be changed after created.
*Code: Alphanumeric code that matches your ERP system identifiers.
The Code must be unique to your account. The Code is case sensitive.
*Name: Give the Code a name. (Max 50 characters)
Description: Describe the Code. (Max 200 characters)
GL Account: Optional General Ledger Account number for ERP mapping.
Active: Check the box if the Code is currently active (can be used). Inactive codes are hidden from the Codes grids.
Codes cannot be deleted, only marked “inactive” by unchecking the box.
- 4
- Click "Create Code" at the bottom to save.
How to View Rate and Revenue Codes
- 1
- Click "Settings", then "Jobs", then the "Codes" tab.
- 2
- Navigate between the grid tabs: All, Rate Codes, and Revenue Codes.
Pro Tip! Click the pin icon next to a tab to have that tab open by default.
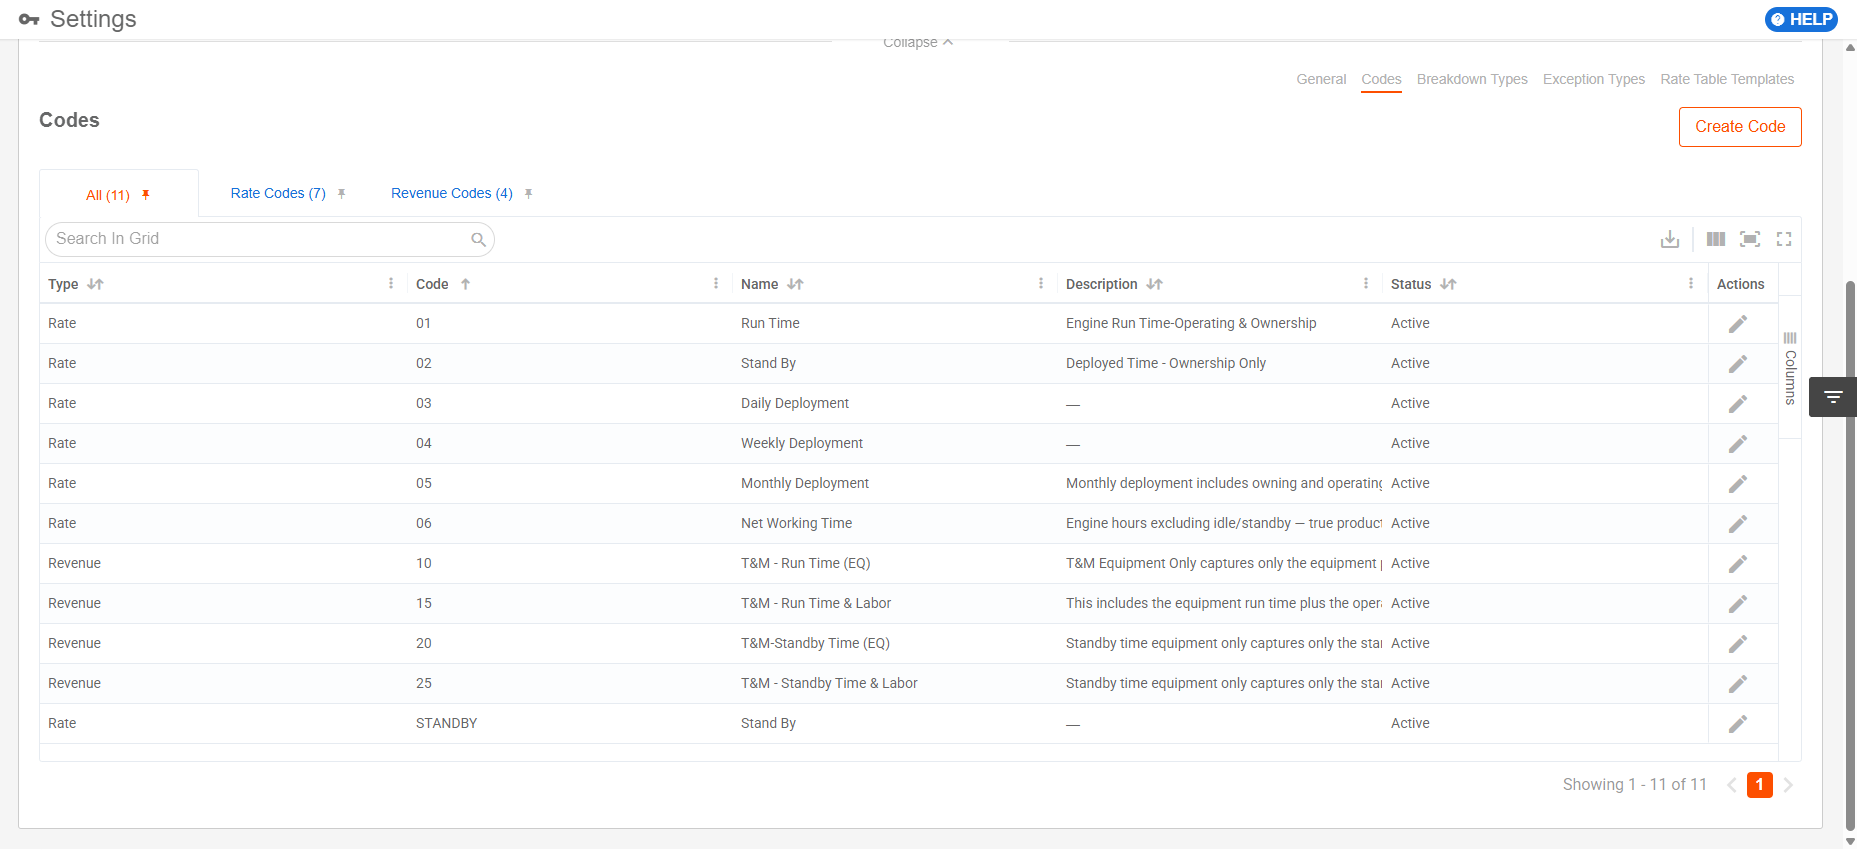
Each grid includes details of each Code:
- Type: Rate or Revenue
- Code: Alphanumeric code entered by the user when created.
- Name: Code name entered by user when created.
- Description: Description of the code entered by user when created.
- GL Account: Optional General Ledger Account number for ERP mapping.
- Status: Active or Inactive
- Created On and By (timestamp and user name)
- Modified On and By (timestamp and user name)
- 3
- Search, filter, and sort the grid.
- Utilize the search bar to quickly find a Code.
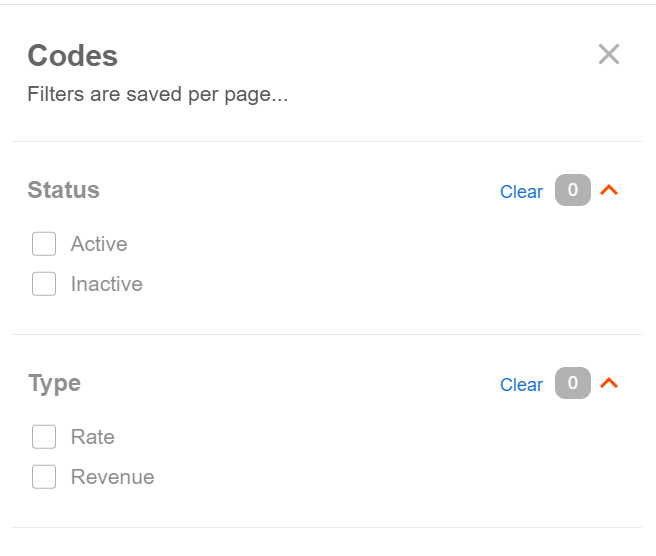
- Click the filters icon to open available grid filters: Status or Type
How to Edit or De-/Re-Activate a Rate or Revenue Code
- 1
- Click "Settings", then "Jobs", then the "Codes" tab.
- 2
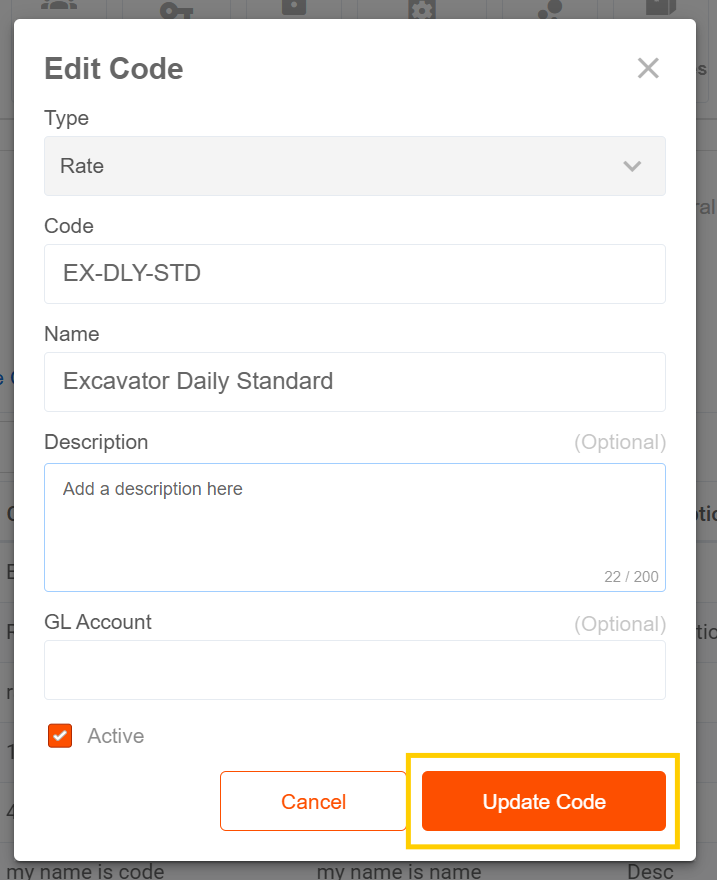
- Find the Code and click the pencil icon next to it.

- 3
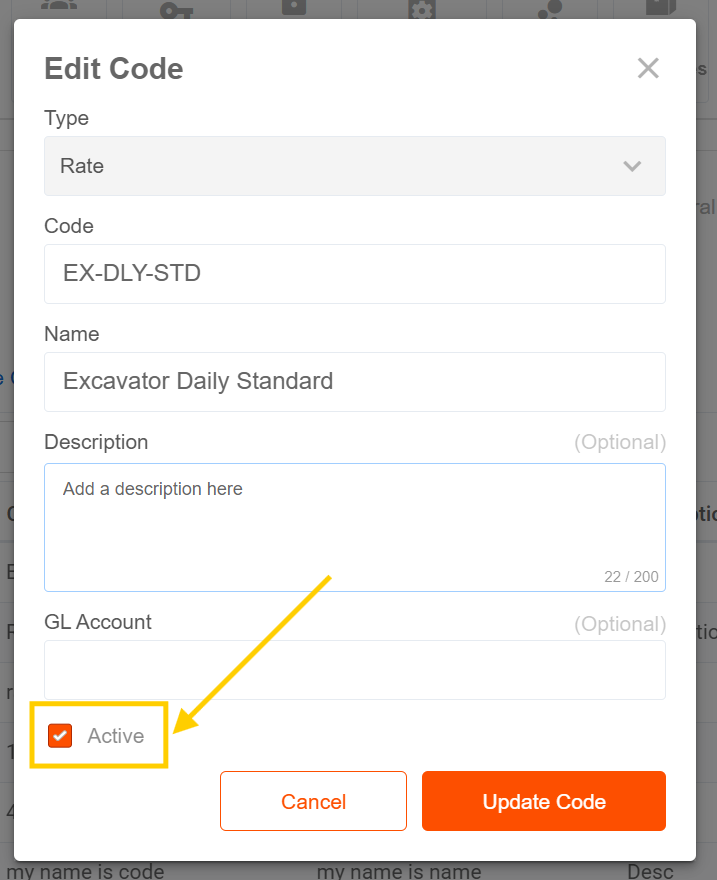
- Edit the Code.
Note: Everything about the Code can be edited except for the Code Type.
To de-activate a Code (because Codes cannot be deleted), un-check the box next to “Active”.
You can also re-activate an inactive Code by checking the box.
- 4
- Click "Update Code" to save changes.