
How to Configure Geofence or Security Perimeter Alerts (Desktop)
Geofence and Security Perimeter Alerts can be created to notify relevant users when an asset enters or exits (or both) the geofence or security perimeter. Alerts can be configured for certain days of the week, certain times, and certain geofence levels. This article shows how to create, view, and edit the alerts.
Permission Requirements:
- Users with the "Manage Geofences and Security Perimeters" permission enabled can configure alerts.
In this article:
Alerts are configured in the Geofences feature.
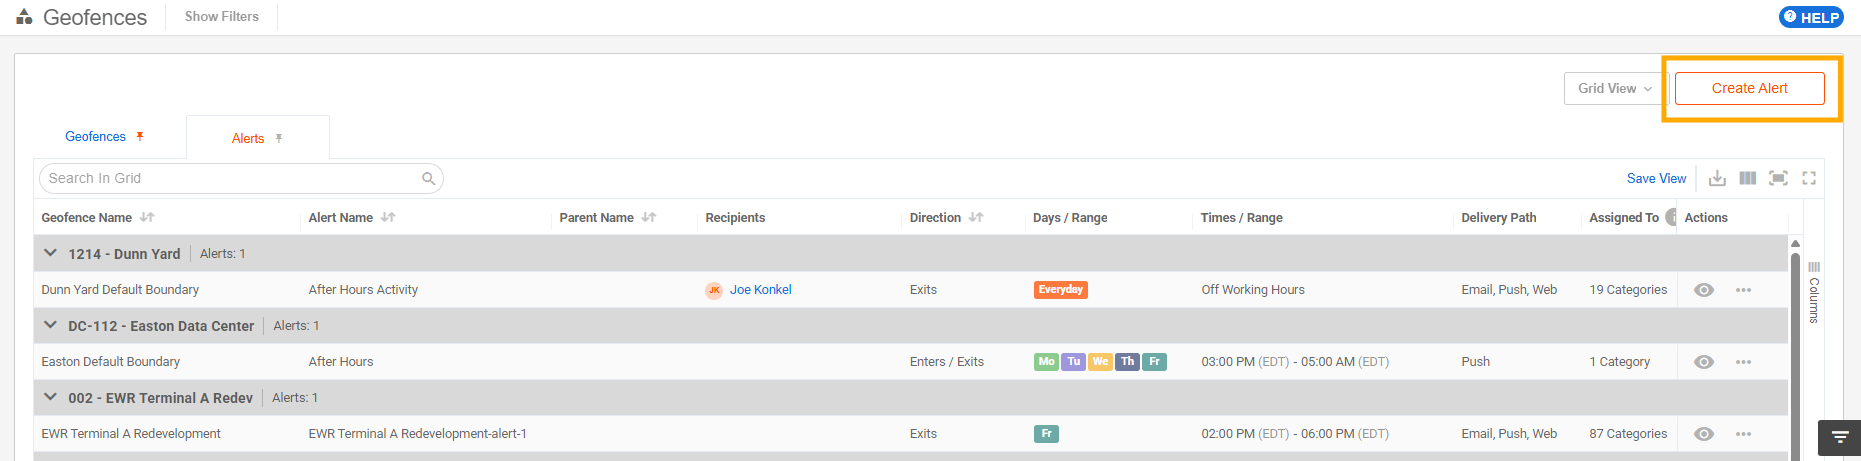
From the Grid View, click the "Alerts" or "Security Perimeter Alerts" tab. Then, click "Create Alert" on the top right.

From the Map View, click on an existing Geofence or Security Perimeter. Then, click on the dotted icon and "Create Alert".

How to Create an Alert
Creating an Enter or Exit alert for both Geofences and Security Perimeters follows the same steps.
- 1
- Click "Create Alert".
- 2
- Select 1 or more Geofences or Security Perimeters to apply the alert to.
This is helpful if you want to bulk apply the same alert parameters to multiple Geofences or Security Perimeters.
Note: You cannot apply one alert to both Geofences and Security Perimeters.

- 3
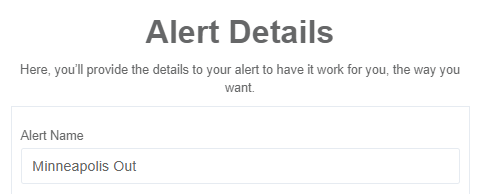
- Name the Alert.
- 4
- Select when to trigger the alert: (When the Asset) Enters, Exits, or both Enters/Exits.
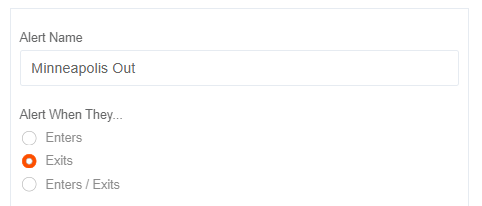
For example, if you are concerned with theft, select Exits so that you are notified if an asset leaves the project.
- 5
- Select when you would like to be alerted.
- Specific Days: Select which days of the week you want to be alerted.
- Day Range: Select a duration of specific dates and times when you would like to be alerted.
Note: This is not when you want to receive the notification, but the window of time in which you want the alerts to trigger.
For example, if you want to know when someone leaves Minneapolis on the weekend, select Saturday and Sunday and All Day.
Another example, if you want to know when someone exits Minneapolis before the project is over, select a Day Range for the project duration.

- 6
- Select when to "Alert on These Times".
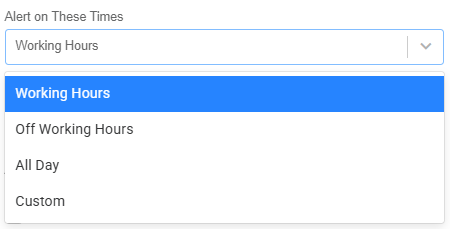
- Working Hours: 7 am to 5 pm in your account's time zone.
- Off Working Hours: Anytime outside of 7 am to 5 pm in your account's time zone.
- All Day: 24/7
- Custom: Select a start and end time for when you want to be alerted.
Note: This is not when you want to receive the notification, but the window of time when you want the alerts to trigger.
For example, if you want to know if someone leaves a project early, select Working Hours.
As another example, if you want to know if someone enters a prohibited location at any time, select All Day.
- 7
- Select Recipients to Alert and notification preference.

- 8
- Click Continue.
- 9
- Select which asset categories you would like to be alerted for.
For example, if you are concerned with theft, select asset categories that should not be moving outside of specific areas during the duration of the project, like heavy equipment.

- 10
- Click Create Alert to complete.
How to View an Alert
Existing Alerts can be viewed on the Alerts tab in the Geofences and Security Perimeters pages.
To view an alert, click the eye icon next to it.

The Alert Details Page includes details about the configurations, as well as a log of alerts.

How to Edit or Delete an Alert
To edit or delete an Alert, click the dotted icon next to the Alert and click “edit” or “delete”.
