How to View, Create and Manage Crews in Resource Management (Desktop)
Crews in Tenna are groups of laborers who typically work together on the same site or type of work. The Crew Management page lets you create and manage these teams so you can schedule and dispatch labor more efficiently.
Permission Requirements: The Crew Management permission must be turned ON for read only access and EDIT to perform actions.
Related Permissions:
- Labor Management allows users to view, create, and manage all labor resources in your account giving you total access of labor and crew management.
- Manage Labor Resources Categories allows users to organize labor types across you account giving you full autonomy of how labor is defined within your organization
💥Crew Management is part of a premium product, Resource Management, and requires a separate license. Please contact your Account Manager for more information on premium product licenses or reach out to Customer Support at help@tenna.com or call 888.836.6269.

In this article:
How to View Your Crews
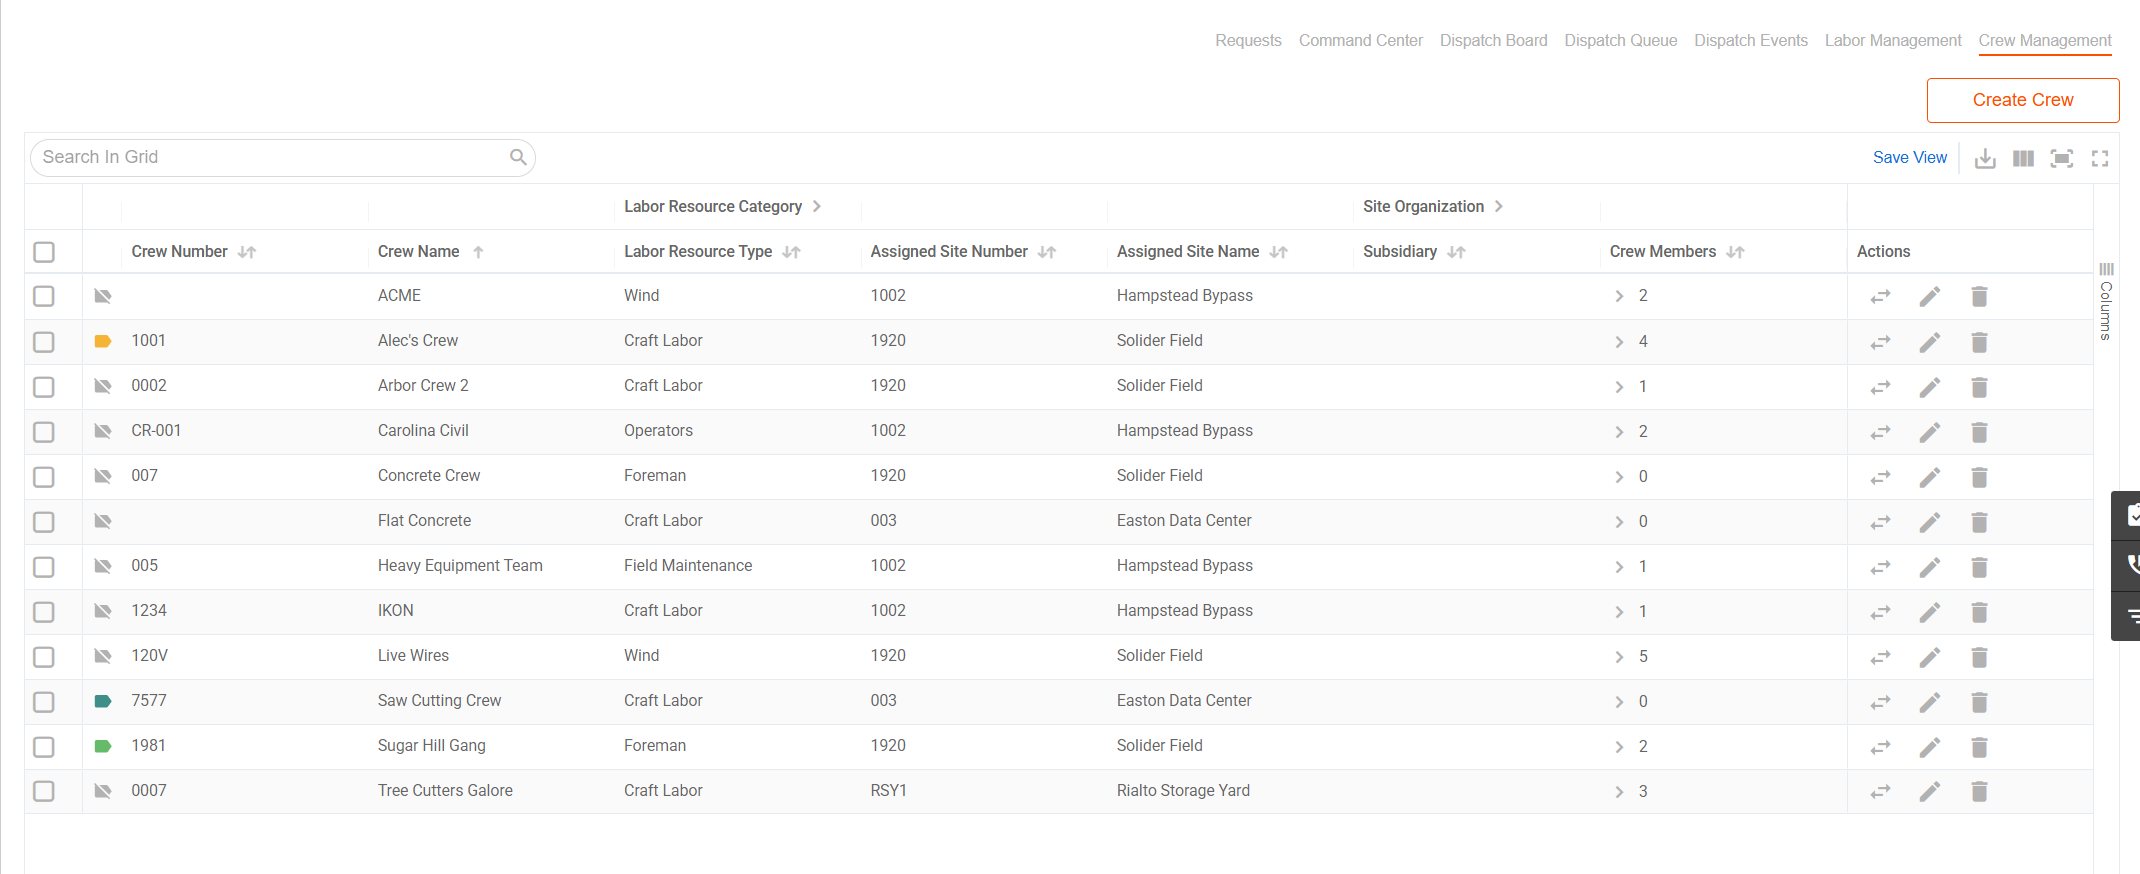
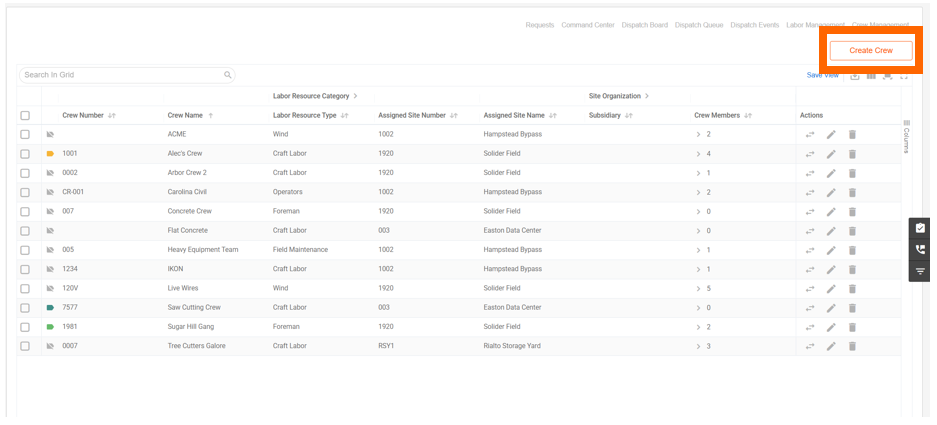
Navigate to the Crew Management page to see a table of all crews in your account. Each row represents one crew and displays high-level details. Click the crew member count to expand a child view listing each individual member, including their name, labor resource category, and employee ID.
Crew table columns include:
- Crew Labels- Optional tags to categorize crews (e.g., "Day Shift," "Concrete," "Union")
- Crew Number- A unique numeric identifier
- Crew Name- The crew's friendly name
- Labor Resource Category / Trade / Classification / Trade Level- The primary labor type for the crew
- Assigned Site Number and Name- The site the crew is currently assigned to
- Subsidiary / Division / Department- Organizational details tied to the crew's site
- Crew Members- The number of members; click to view the full member list
The table is paginated and displays up to 100 crews per page. Use the search bar above the table to find crews by number, name, labor resource category, or site. Click any column header to sort ascending or descending.
NOTE: Laborers and Labor Resource Categories must be set up before you can create a crew. View How to View, Create and Manage Laborers in Resource Management (Desktop) and How to Create and Manage Labor Resource Categories (Desktop).
How to Search, Filter, and Save Crews
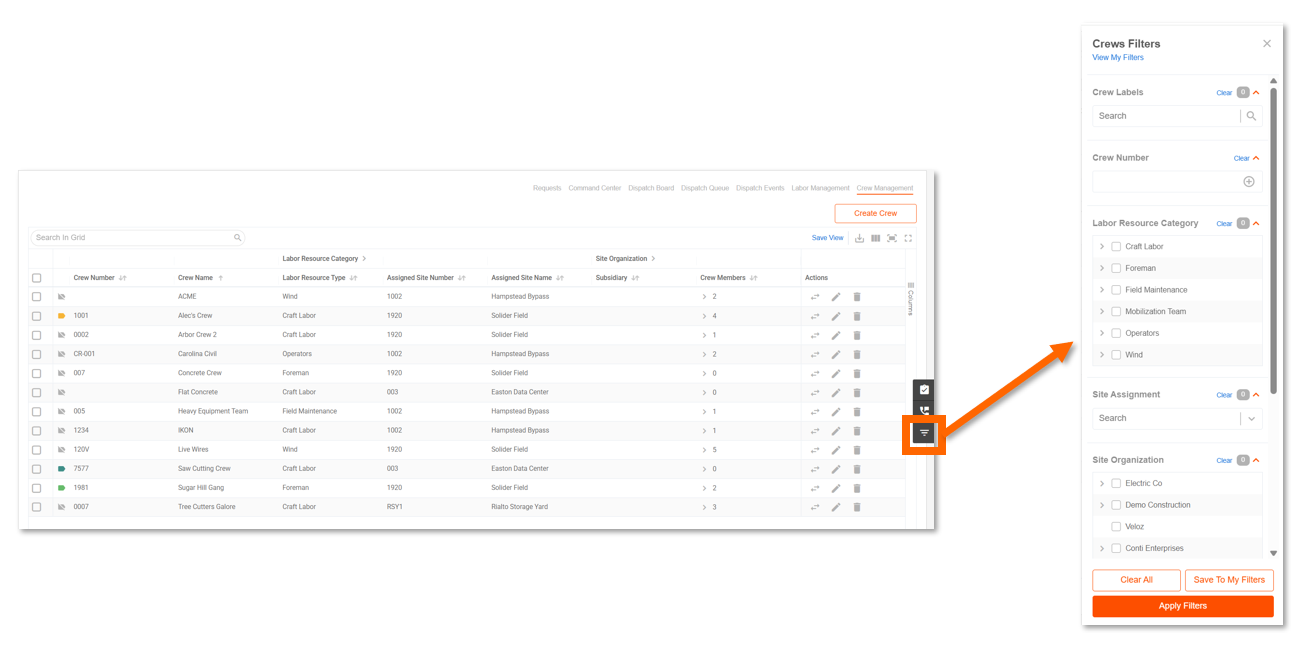
Open the filters panel on the right side of the page to narrow down your crew list. Available filters include crew labels, crew number, labor resource category, site assignment, and site organization.
The Site Assignment filter displays sites in the format Site Number – Site Name and can be searched by either site number or name.
As you apply filters, a chip appears for each one. Click the X on a chip to remove an individual filter, or click Clear All to start over.
To save a filter combination for future use, apply your filters and click Save / View My Filters. Give it a clear name and access it anytime without having to set it up again.
How to Export Your Crew List
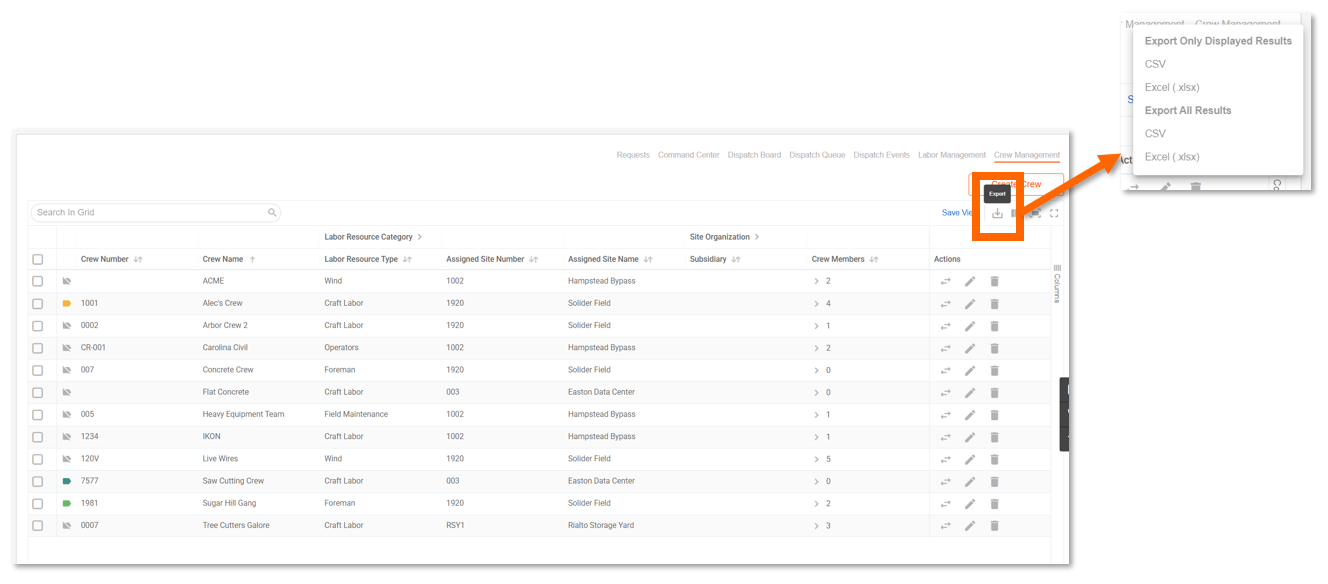
Use the Export option to download your full crew list. Exports include all visible columns except the Actions column and are available in CSV, XLSX, and XML formats. Tenna exports all crews in your account — not just the current page.
How to Create a Crew
- 1
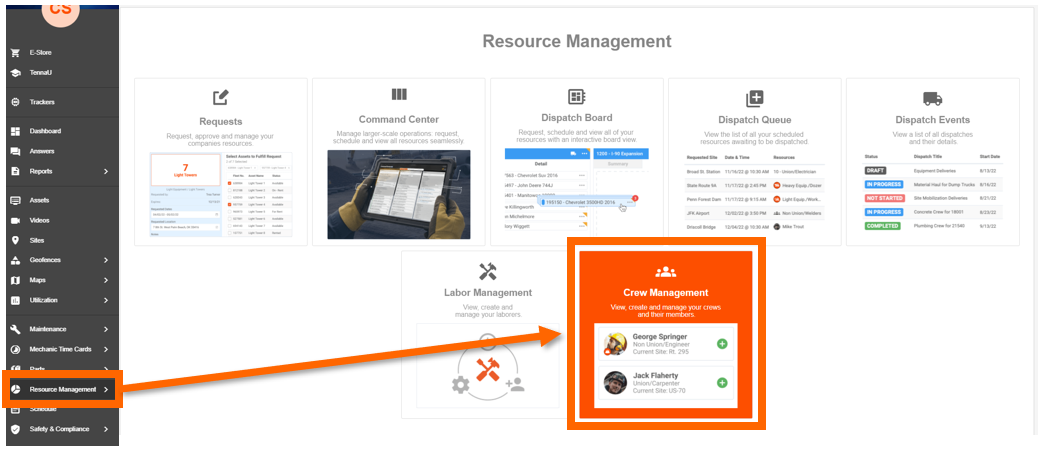
- Click "Resource Management" on the left navigation menu, then click the "Crew Management" tile.
- 2
- Click the "Create Crew" button at the top-right of the page.
- 3
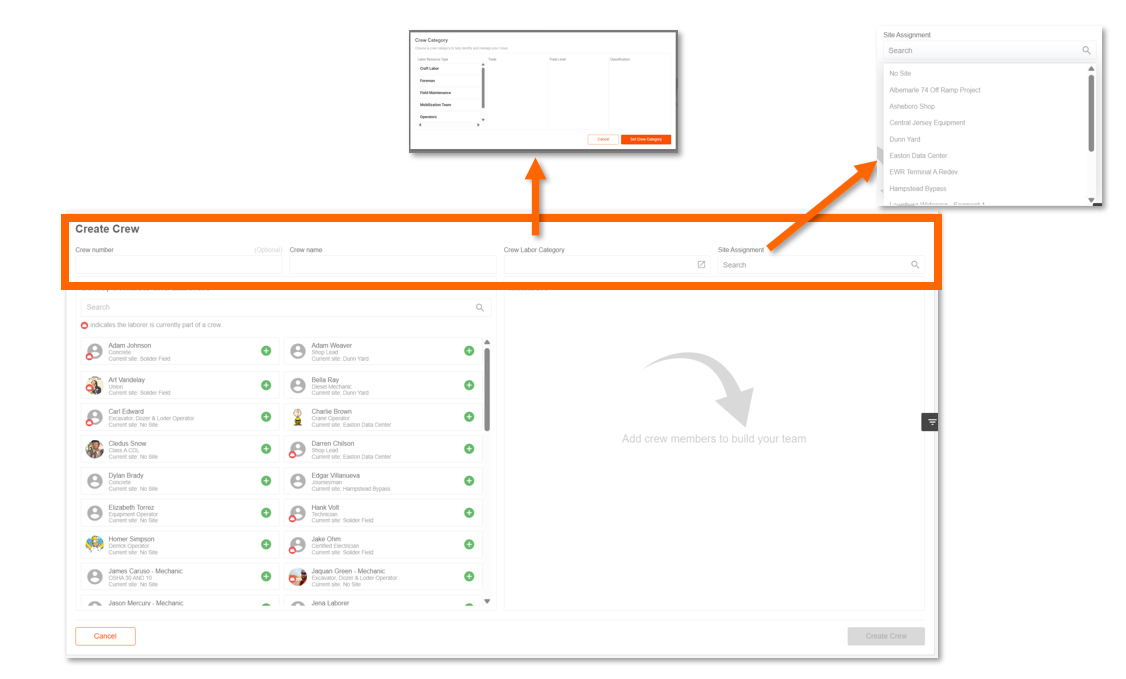
- Enter the general crew details.
Fill in the following required fields:
- Crew Number (optional) - Must be unique.
- Crew Name - Use a clear, descriptive name your team will recognize.
- Crew Labor Category - Select the crew's primary labor type from the category modal and click Set Crew Category to confirm.
- Site Assignment - Select the site this crew will be assigned to. If the crew isn't yet assigned to a site, select No Site.
- 4
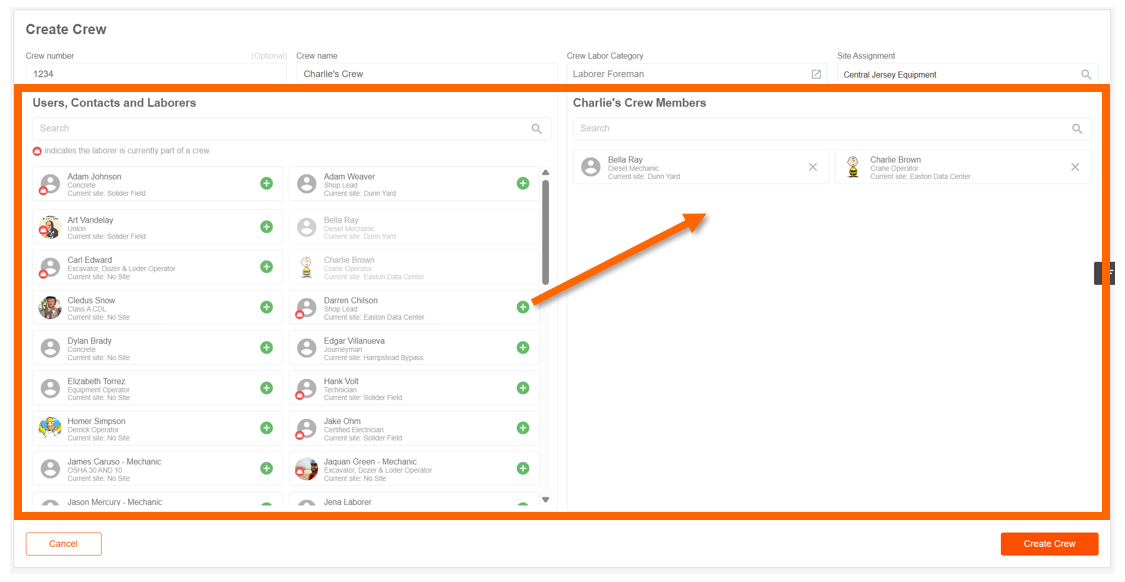
- Add laborers to the crew.
The Create Crew page is divided into two panels:
- Left panel - Available laborers (users, contacts, and laborers in your account)
- Right panel - Members currently assigned to this crew
Use the search bar or filters on the left panel to find laborers by name, labor resource category, site, or organization. Click the + icon on a laborer card to add them to the crew. Once added, the card's appearance will update to indicate they've been assigned.
To remove a member, click the X icon on their card in the right panel. They'll return to the available list on the left.
- 5
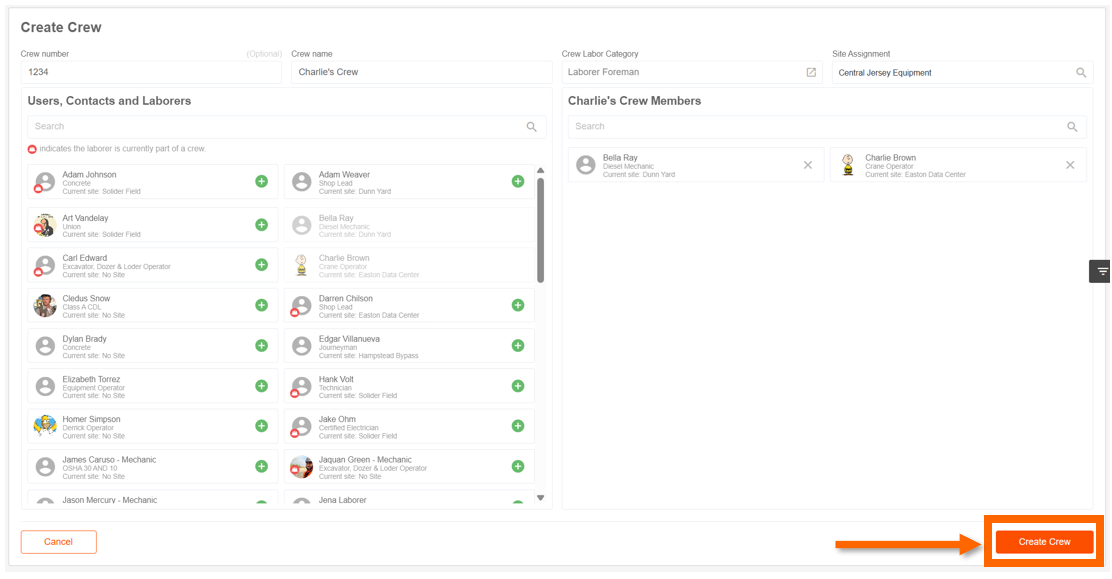
- Save the crew.
Once all required fields are complete and at least one laborer has been added, click Create Crew to save. Click Cancel to discard changes and return to the previous page.
How to Transfer a Crew to Another Site
- 1
- Click Find the crew in the table and click the "arrow" (transfer) icon under the Actions column.
- 2
- In the modal that appears, search for and select the destination site.
- 3
- Click "Transfer Crew" to confirm.

NOTE: If a site is later closed or deleted, crew and member site assignments will automatically reset to No Site.
How to Edit a Crew
- 1
- Click the "pencil" (edit) icon in the Actions column for the crew you'd like to edit.
- 2
- Update the general details or add and remove laborers as needed.
- 3
- Click "Update Crew" to save your changes.
Important! If you change the crew's site or members, confirmation prompts may appear, particularly when scheduled dispatch events are affected.

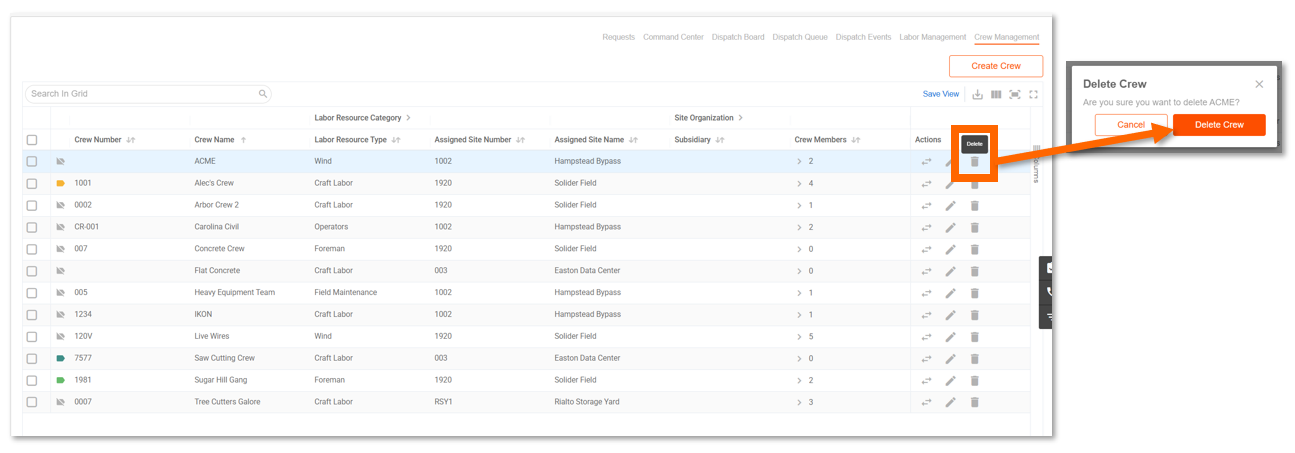
How to Delete a Crew
To remove a crew, find it in the table and click the trash (delete) icon in the Actions column. Confirm the deletion in the modal that appears. Deleting a crew removes the crew configuration but does not delete the individual laborers within it.
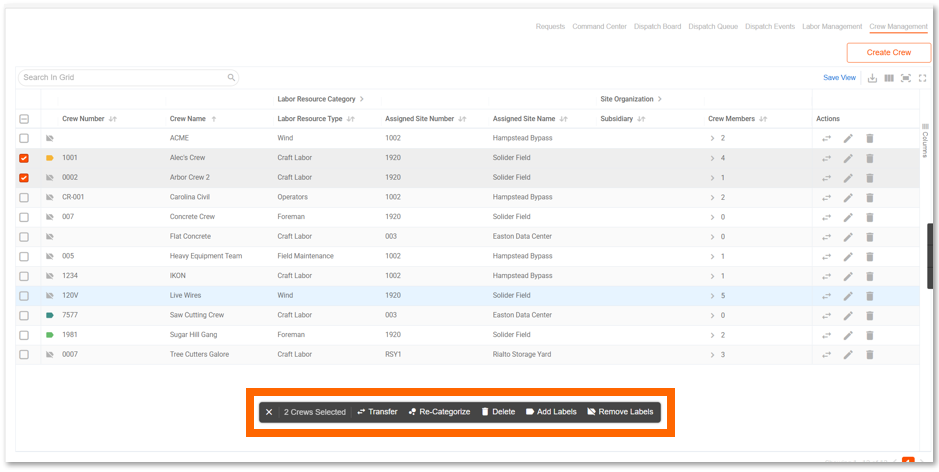
Bulk Actions
Permissioned users can now perform the following bulk actions in Crew Management:
- Transfer
- Re-Categorize
- Delete
- Add Labels
- Remove Labels
Use Case Example- Add Labels:
A job is rain delayed, and the equipment manager for the site needs to label the crew(s) for that particular site "Rain Delayed" so the equipment manager would change the labels for those crews for the duration of the delay.
Site Assignment Rules
Crew and laborer site assignments are automatically kept in sync:
- Changing a crew's site - All current crew members are updated to the new site. A confirmation prompt will appear before the change is applied.
- Adding a laborer to a crew - The laborer inherits the crew's current site assignment.
- Removing a laborer from a crew - The laborer retains the site they were assigned to while in the crew. No automatic site change occurs.
NOTE: If a laborer is already assigned to another crew, you'll be prompted before moving them. If you proceed, they'll be removed from the previous crew and added to the new one. A laborer can only belong to one crew at a time.
Troubleshooting
Why can't I save my new crew? Check that all required fields are complete: crew number, crew name, labor category, and site assignment - and that at least one laborer has been added as a member.
What happens when I move a crew to a new site? The crew's site is updated and all member site assignments are updated to match.
Can a laborer belong to more than one crew? No. A laborer can only be assigned to one crew at a time. If you add a laborer who already belongs to another crew, they will be removed from the previous crew.