Dispatch Command Center Master View
Master View is your central hub for managing resource requests, available assets, and job sites in one place. Use it to match what your teams need with what you have available, and take action without switching between screens.
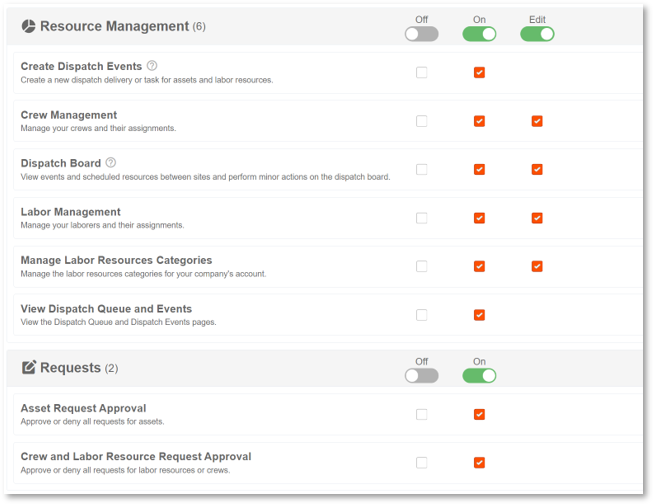
Permission Requirements: The Dispatch Board permission must be turned ON for read only access or set to EDIT to perform actions.
Related Permissions:
- "Request Approval" enables Advanced Flows
- "Transfer Assets" enables Transfer Actions
- "Labor/Crew Management" set to edit enables Transfer Actions
- "View Dispatch Queue & Events" enables access to Dispatch Management View
- "Create Dispatch Events" enables Advanced Flows
💥Dispatch Command Center is part of a premium product, Resource Management, and requires a separate license. Please contact your Account Manager for more information on premium product licenses or reach out to Customer Support at help@tenna.com or call 888.836.6269.
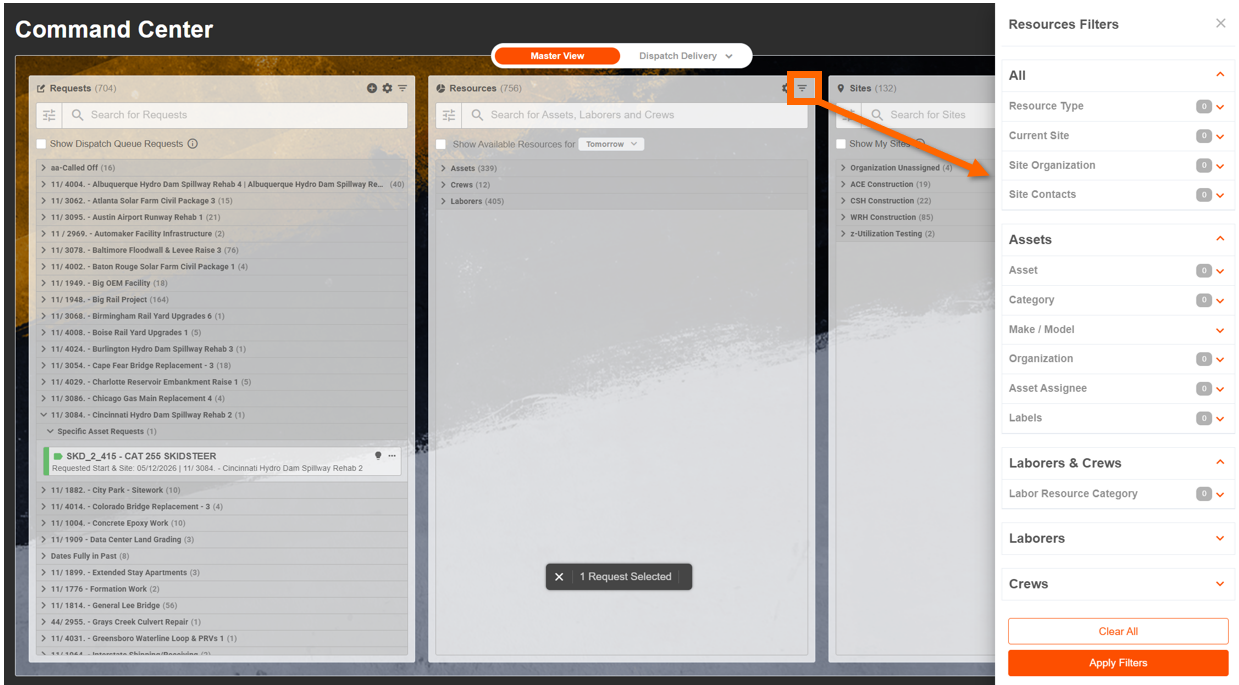
How Master View is Organized
Master View uses a three-column layout that shows you everything at a glance.

Column 1: Requests (What Your Teams Need)
Displays all incoming resource demand. Request types include:
- Specific equipment requests ("I need Excavator #247")
- General equipment requests ("I need any excavator with a 24-foot reach")
- Specific laborer requests ("I need John Smith, our certified welder")
- General labor requests ("I need any certified welder")
- Crew requests ("I need the Concrete Finishing Crew")
Select a view to organize requests. Choose your preferred view to help manage and review requests:
- Request by Site Organization > Site > Request Type
- Requests by Site > Request Type
- Flat List
From Column 1, you can:
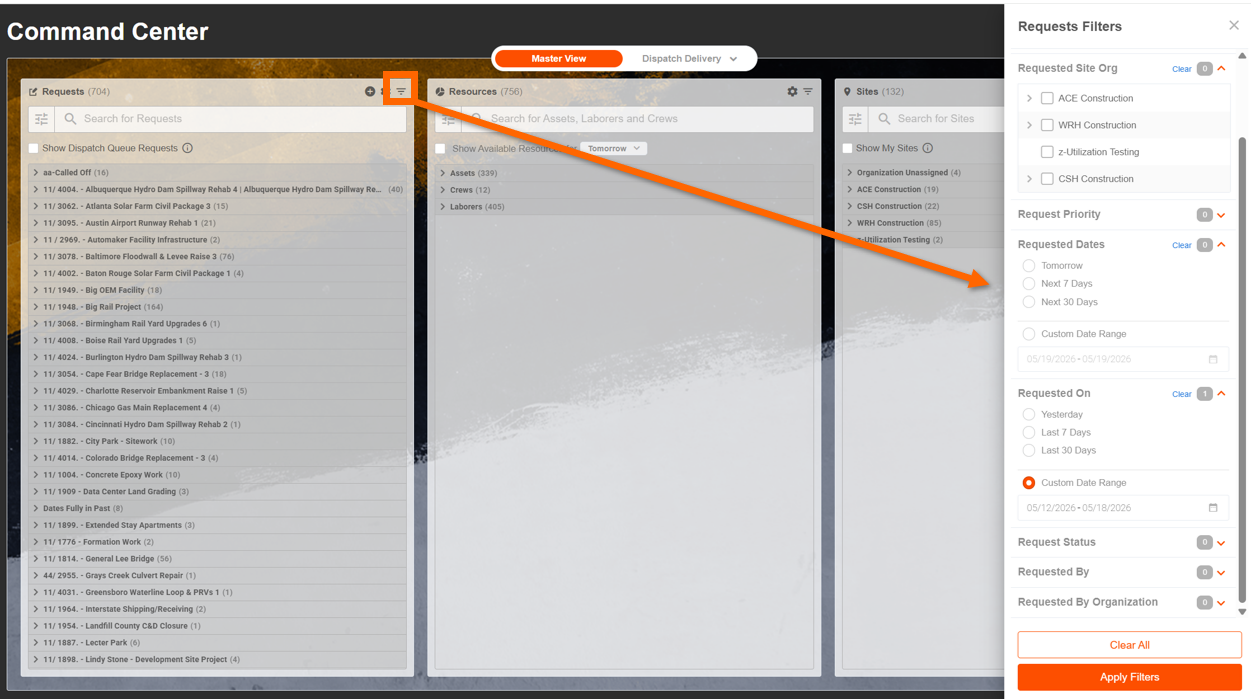
Search and filter by site, date, status, priority, or who requested it.
Take action on individual requests: Approve, deny, cancel, or remove from queue.
Resolve scheduling conflicts before they become problems.
Review recommended resources that best match each request.
View complete request details in an expandable side panel.

Create dispatch events directly from approved requests.

Column 2: Resources (What You Can Deploy)
Displays all assets available for deployment, including GPS-tracked and non-tracked equipment, individual laborers, and crews.
Resources are grouped by type and category for easy browsing.
Use advanced filters to find exactly what you need.
Availability indicators to see what's uncommitted and ready to go.

From Column 2, you can:
- Quickly search for available resources using multiple filter criteria
- Transfer resources between sites
Schedule equipment or crews for future dispatch.
View real-time insights on resource utilization.
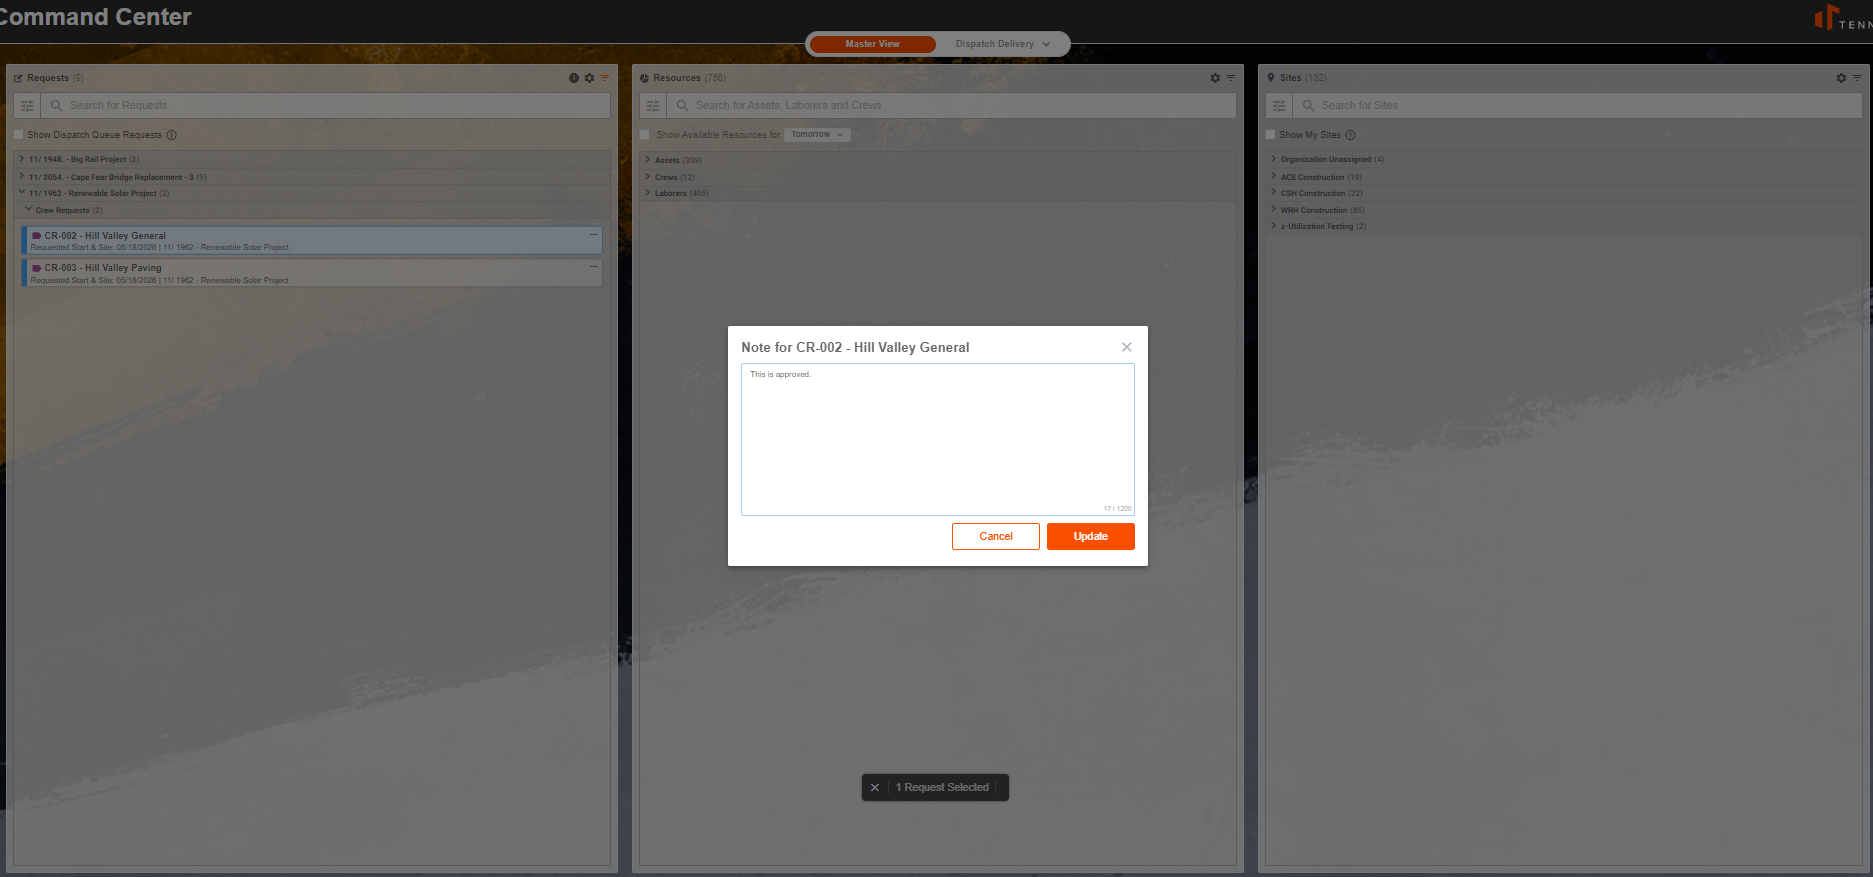
Add notes to any resource for team communication.
Column 3: Sites (Where the Work Happens)
This column displays all locations where work is happening, including active job sites, equipment yards, and company facilities.
From Column 3, you can:
View complete site details.
Drag resources directly to sites to schedule or dispatch them.
How to Fulfill a Resource Request from Command Center
- 1
- Select a filter (priority, date, or location) to focus the request queue.
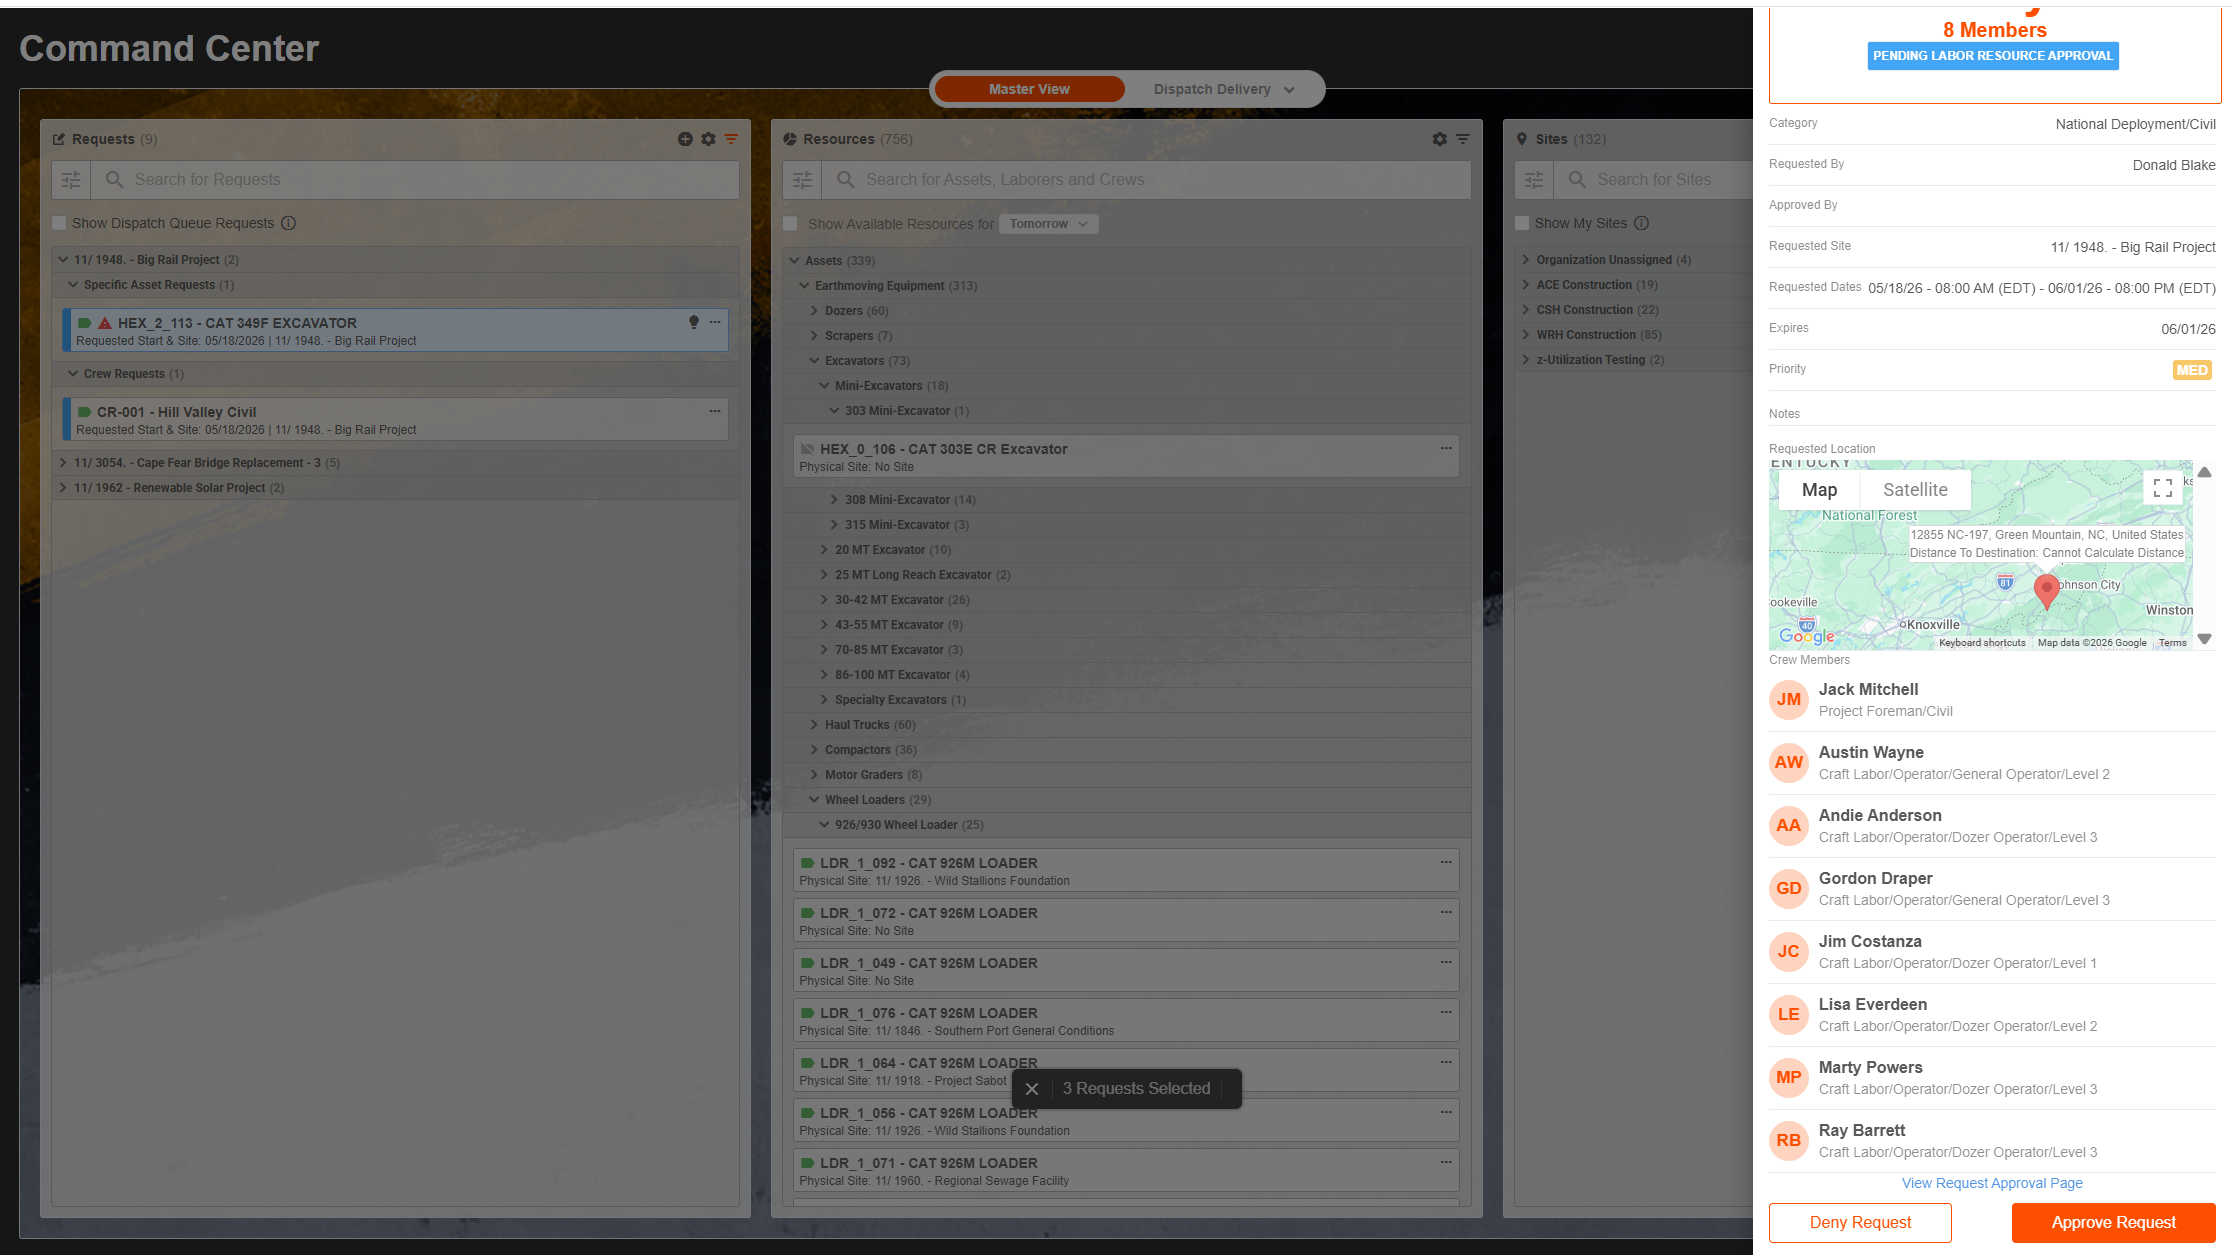
- 2
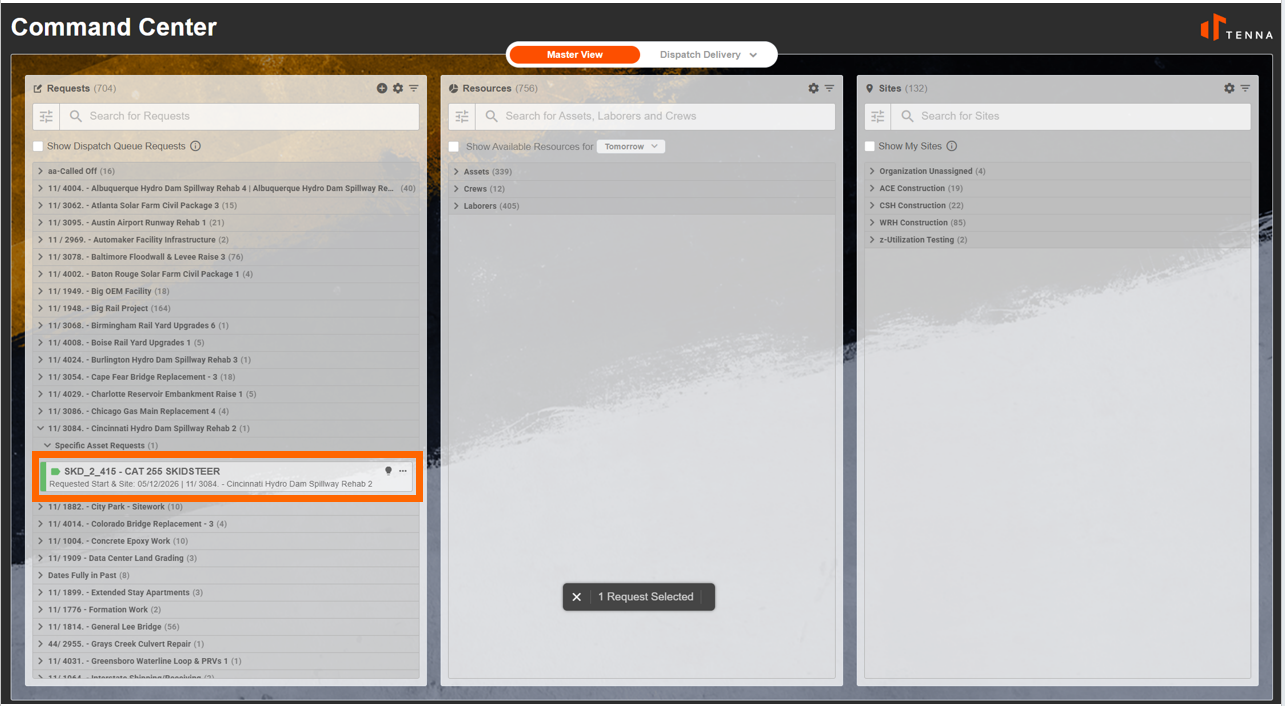
- Click a request to review full details, including site needs, timeline, and any special requirements.
- 3
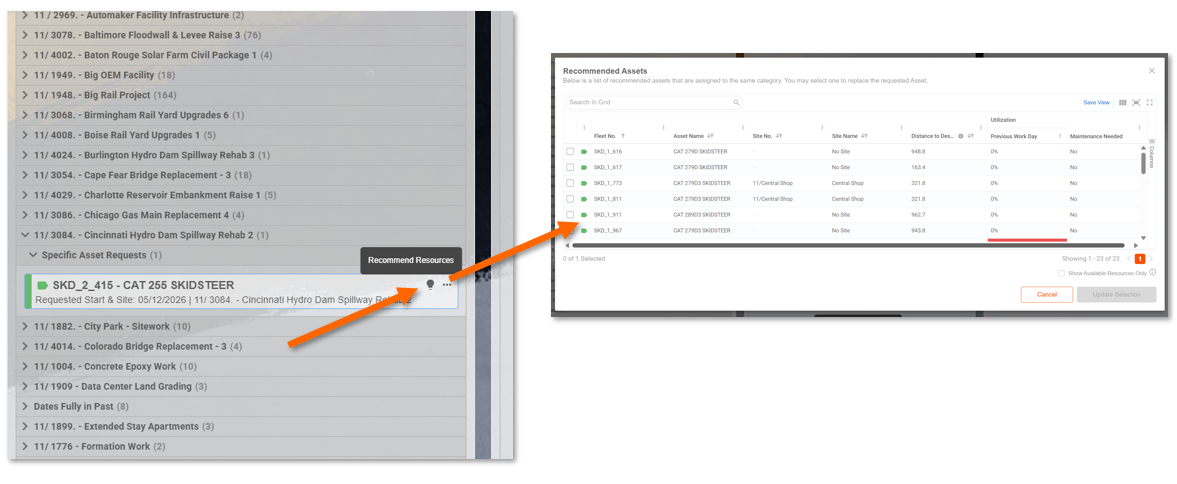
- Select "Recommended Resources" to see the best options based on availability, location, and capabilities.
- 4
- Refine the Resources column as needed; filter by Category or Trade, or focus on uncommitted resources near the target site.
- 5
- Take action on the request.
- Select "Approve" to schedule the resource.
- Select "Deny" and document the reason if the request cannot be fulfilled.
- Select "Confirm and Dispatch" to create a dispatch event when ready.
- 6
- Add a note to the request so your team is informed of the decision. (optional)